There’s something timeless about a granny square blanket. It feels nostalgic, cozy, and creative all at once. Whether you go for classic color combos or a scrappy stash-busting design, granny square blankets are one of the most satisfying crochet projects you can make.
The best part? You build it one square at a time — no overwhelming giant project from day one.
Let’s walk through how to crochet a beautiful granny square blanket step by step.
🧶 Step 1: Choose Your Yarn & Hook
For beginners, stick with:
- DK or worsted weight yarn (#3–4)
- 4.5mm–5.5mm crochet hook
This combo gives:
- Good drape
- Minimal gaps
- Balanced stitch definition
Want a faster project?
Use chunky #5 yarn with an 8mm hook for a squishier, quicker blanket.
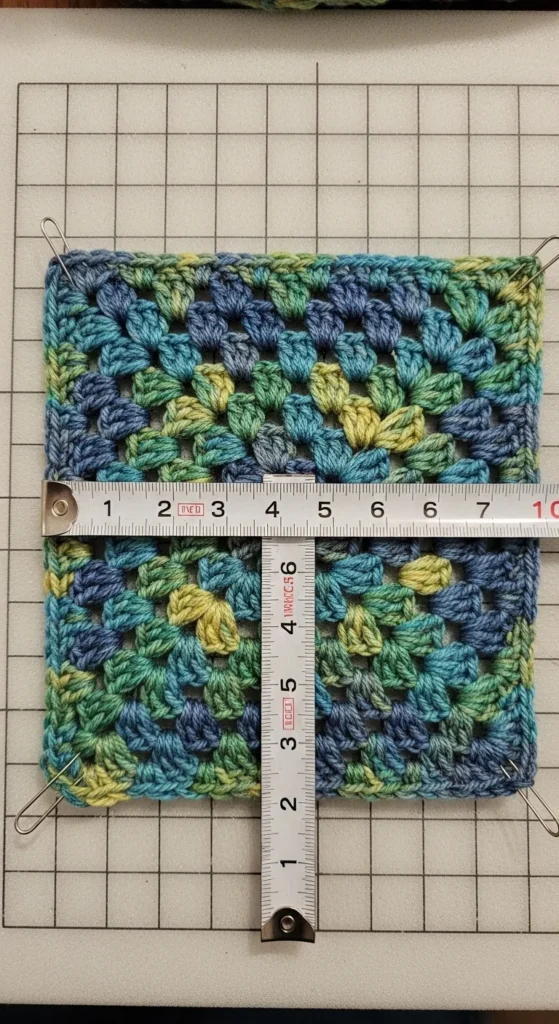
📏 Step 2: Make Consistent 6-Inch Squares
Consistency is key.
A 6-inch granny square is the sweet spot:
- Easy to handle
- Great for layout planning
- Quick to finish (about 30 minutes each)
With DK yarn and a 5mm hook:
- About 5 rounds usually = 6 inches
Pro Tip:
Block your first square and measure it. Use that as your size guide for the rest.
🧵 Step 3: Decide How Big Your Blanket Will Be
Here’s a simple size guide using 6-inch squares:
- Baby throw (36×48″) → 6 x 8 grid = 48 squares
- Lap blanket (40×60″) → 7 x 10 grid = 70 squares
- Small throw (48×60″) → 8 x 10 grid = 80 squares
Planning your grid first prevents layout confusion later.
Sketch your layout or use printable grid paper to map colors.
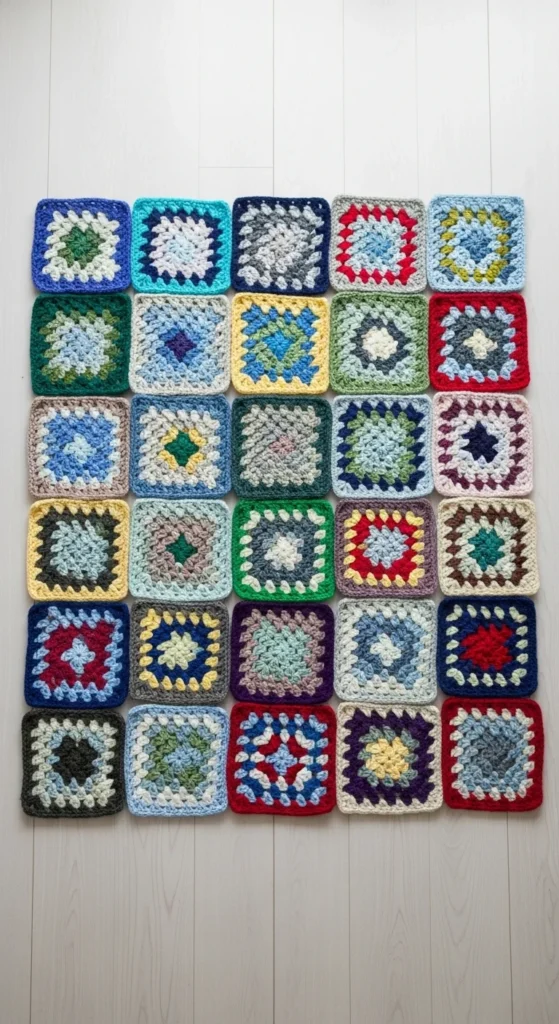
🎨 Step 4: Plan Your Color Placement
Color placement makes or breaks a granny blanket.
Trending ideas:
- Scrappy multi-color squares
- Soft neutrals with one accent color
- Solid granny squares (denser look)
- Gradient ombré layouts
Helpful tip:
Lay all squares on the floor before joining. Move them around until the design feels balanced.
🧶 Step 5: Weave Tails Before Joining
Don’t wait until the end.
Weave in tails as you go:
- Use a tapestry needle
- Weave in multiple directions
- Trim carefully
This prevents “tail overload” later.
Trust me — future you will be grateful.
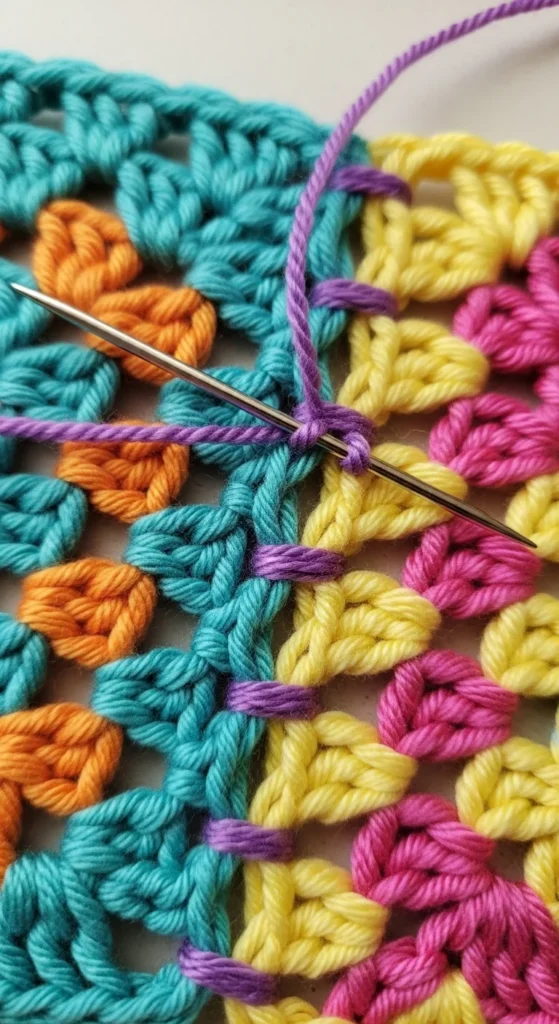
🔗 Step 6: Join the Squares (3 Easy Methods)
You have options depending on the look you want.
Option 1: Join-As-You-Go (JAYG)
- No sewing
- Connect squares while crocheting final round
- Fast and seamless
Option 2: Mattress Stitch
- Invisible seam
- Clean and flat
- Great for solid granny squares
Option 3: Flat Slip Stitch Join
- Decorative ridge
- Slight texture between squares
If you hate sewing, try join-as-you-go — it saves serious time.
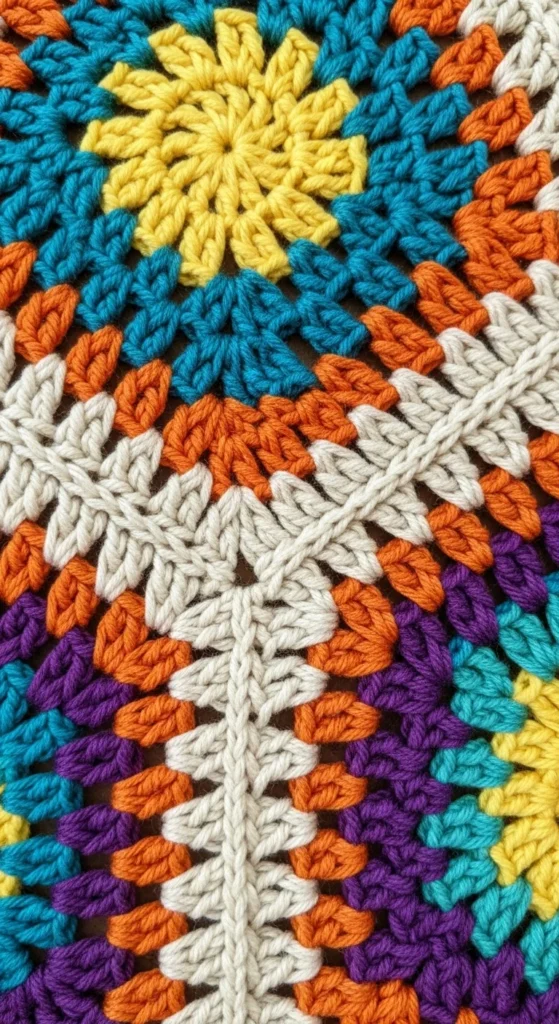
🧵 Step 7: Add an Anti-Curl Border
Borders stabilize everything.
Start with:
- 1–2 rounds of single crochet around the entire blanket
At each corner:
- Work 3 single crochet in the same stitch
- This prevents rippling
Want something fancier?
- Shell border
- Picot edging
- Double crochet frame in contrast color
🧼 Step 8: Block the Entire Blanket
Blocking makes a big difference.
To block:
- Lightly steam (without touching yarn)
- Lay flat and shape evenly
- Let cool completely
Blocking:
- Flattens seams
- Smooths out ripples
- Makes the blanket look professionally finished
🚫 Common Mistakes (And How to Avoid Them)
Squares different sizes?
- Check tension
- Use same hook throughout
- Block consistently
Border rippling?
- Too many stitches
- Add proper 3SC corner increases
Gaps too big?
- Go down one hook size
- Use tighter tension
Layout looks messy?
- Plan with a grid before joining
✨ Fast Chunky Alternative
If you want a quicker project:
- Use bulky #5 yarn
- 8mm hook
- Larger squares = fewer total squares
This creates a squishy, cozy blanket with less joining time.
💛 Final Thoughts
Crocheting a granny square blanket isn’t complicated — it’s modular. One square at a time builds into something beautiful.
With:
- Consistent 6-inch squares
- Planned layout
- Clean joins
- A stabilizing border
You’ll have a cozy, timeless blanket ready to use or gift.
🧶 Save this guide, start your first square today, and build your granny blanket one square at a time!


