
Blank walls can make even the most beautiful room feel unfinished. The good news? You don’t need expensive art or professional designers to fix that. With smart DIY wall decor ideas, you can instantly elevate a space and make it feel intentional, stylish, and pulled together.
DIY wall decor isn’t about filling space—it’s about creating visual balance and personality. Below, you’ll learn simple, proven ways to design wall decor that looks polished and high-end, even on a budget.
Start With the Wall’s Purpose and Mood
Before choosing what to hang, decide what role the wall plays in the room.
Ask yourself:
- Is this a focal wall or a supporting background?
- Should it feel calm, bold, cozy, or artistic?
- Is the room used for relaxing, working, or entertaining?
For example:
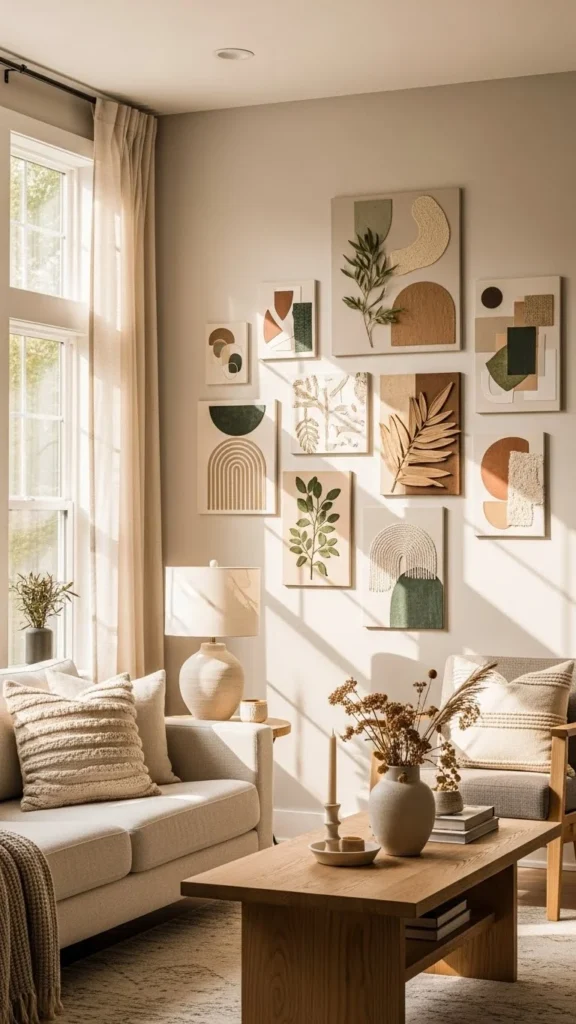
- Living rooms benefit from statement pieces or gallery walls
- Bedrooms look best with soft, calming decor
- Entryways shine with eye-catching but simple designs
Knowing the purpose keeps your DIY decor from feeling random or overwhelming.
Choose One Strong Wall Decor Style
Rooms feel elevated when wall decor follows a clear style instead of mixing everything together.
Popular DIY-friendly wall decor styles:
- Minimalist (clean lines, neutral colors)
- Boho (textures, organic shapes, warm tones)
- Modern (abstract art, black frames, contrast)
- Farmhouse-inspired (wood accents, soft neutrals)
Stick to one main style per wall. This instantly creates a store-quality look.
Use Scale and Proportion Correctly
One of the biggest DIY mistakes is choosing wall decor that’s too small. Store displays almost always use larger pieces or intentional groupings.
Helpful guidelines:
- Large walls need large art or grouped pieces
- Art above furniture should be about two-thirds the width of the furniture
- Small walls work best with vertical or stacked designs
If you’re working with budget-friendly supplies, go bigger by:
- Using oversized paper or canvas
- Grouping smaller DIY pieces together
- Creating one large statement piece instead of several tiny ones
Size alone can make DIY decor feel expensive.
Create Texture for a High-End Look
Professional interiors rarely rely on flat decor alone. Texture adds depth and makes walls visually interesting—even in neutral spaces.
Easy DIY texture ideas:
- Fabric wall hangings
- Wooden slats or panels
- Plaster-style wall art
- Layered paper or canvas art
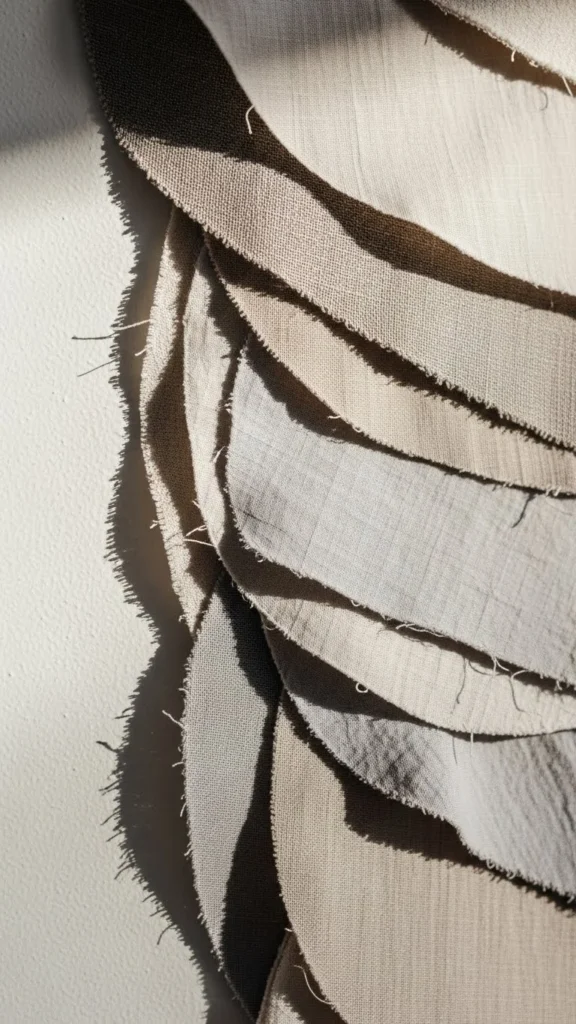
Textured wall decor catches light naturally, making the space feel richer and more intentional.
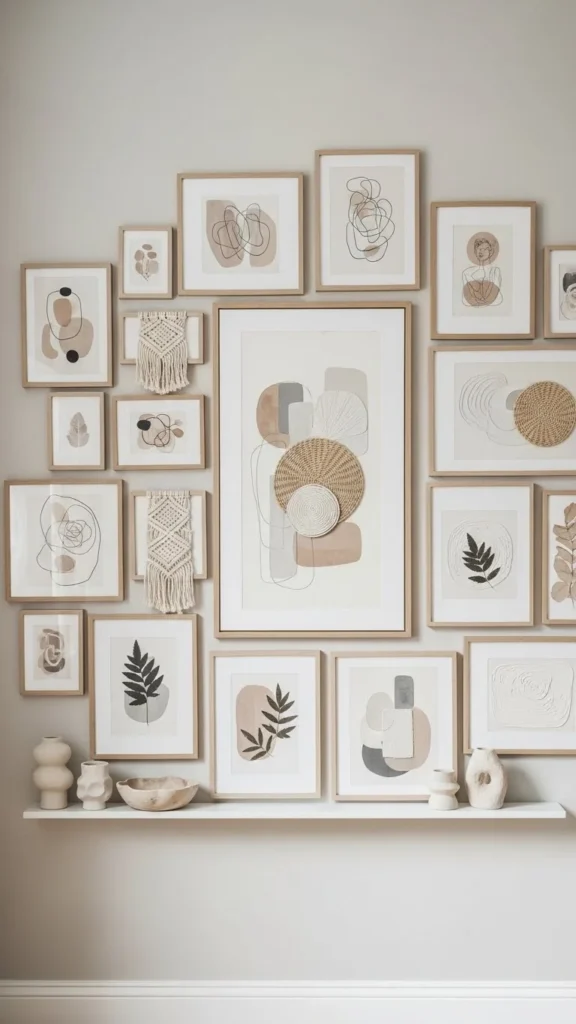
Keep Colors Simple and Coordinated
High-end wall decor almost always follows a limited color palette. This doesn’t mean boring—it means balanced.
Best color approach:
- Choose 2–3 main colors
- Use variations of the same shade
- Let texture and shape do the work
Neutral palettes work especially well:
- Warm white
- Beige and soft taupe
- Muted gray
- Earthy clay or sage tones
This allows your DIY wall decor to blend seamlessly with store-bought furnishings.
Arrange With Intention Before Hanging
Never hang DIY wall decor straight from the worktable. Layout planning is what separates amateur from polished results.
Before hanging:
- Lay everything on the floor first
- Take a photo to check balance
- Adjust spacing and alignment
Spacing tips:
- Keep gaps consistent
- Align edges visually, not just mathematically
- Center arrangements at eye level
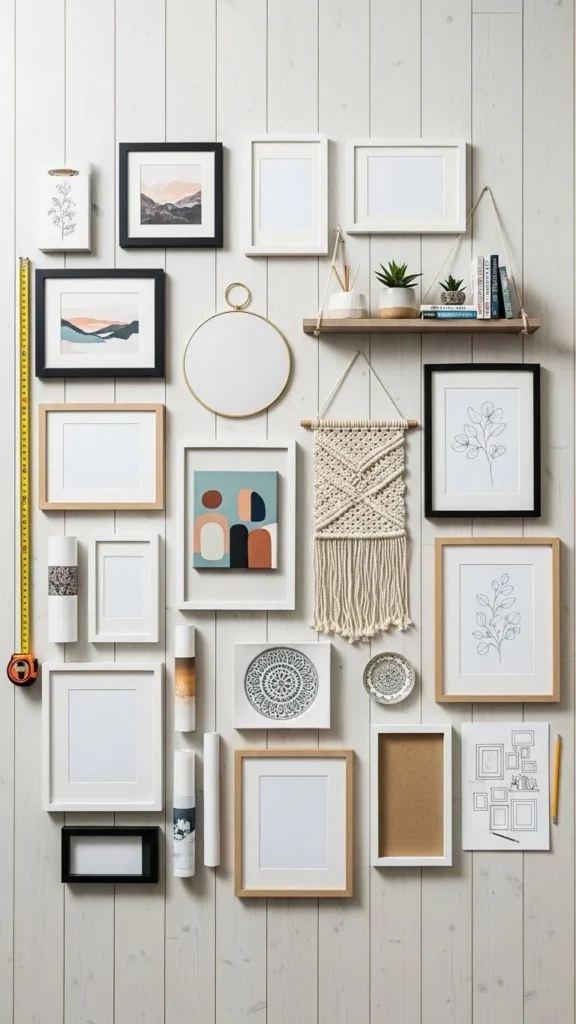
This step saves time and prevents unnecessary holes in the wall.
Style the Wall as Part of the Whole Room
Your wall decor should connect visually with the rest of the space.
Tie it together by matching:
- Frame colors with furniture tones
- Art colors with pillows or rugs
- Materials with nearby decor items
Think of wall decor as a supporting character—not a solo performance. When it complements the room, everything feels elevated.
Final Takeaway: Elevation Comes From Intention
DIY wall decor doesn’t need to be complicated to look impressive. When you focus on scale, texture, simplicity, and thoughtful placement, even the most affordable materials can create a stunning impact.
Start with one wall. Choose a clear style. Take your time with layout and finishing. You’ll be amazed how quickly your room transforms.
✨ Save this idea for later and start turning blank walls into beautiful statements today!


