
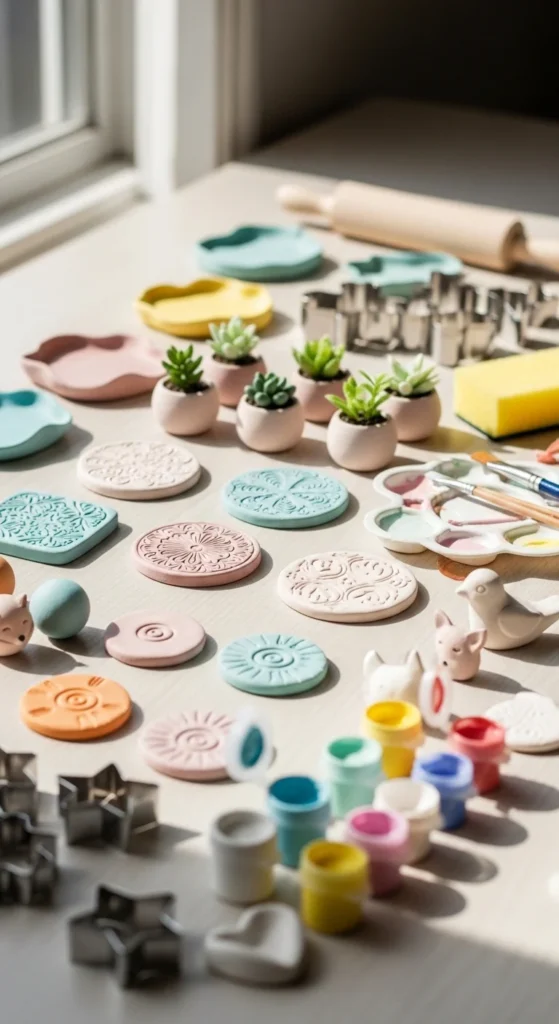
Air dry clay makes crafting simple for beginners. No kiln needed. No oven required. Just shape, let dry for 24–72 hours, then paint and seal. Many easy beginner projects focus on functional decor like planters, coasters, dishes, and small accessories. With damp hands, a sponge, and a rolling pin, you can create smooth shapes without cracks or sticky mess. Below are practical ideas that use household tools, budget supplies, and step-by-step simplicity.
1. Mini Trinket Dish for Rings
Start with a simple circle of air dry clay. Roll it into a thin slab using a rolling pin and guide sticks for even thickness. Press the slab gently into a small bowl to create shape.
Use damp hands to smooth edges. A sponge blends seams and removes fingerprints.
Let dry completely for 24–48 hours. Sand lightly with 220-grit paper.
Paint with acrylic paint after full drying. Apply three thin coats for solid color.
Seal with acrylic varnish to protect from water.
This project takes minutes to shape. It’s affordable and practical. Perfect for rings or keys.
2. 4-Inch Clay Coasters
Roll clay evenly to about ¼ inch thick. Use a bowl or lid to cut a 4-inch circle.
Press lace or leaves into the surface for texture.
Smooth edges with a damp sponge.
Dry flat to prevent warping.
After drying, sand gently and apply acrylic paint if desired.
Finish with seal varnish for durability.
Stackable and functional, coasters are great starter projects.
3. Simple Snail Figurines
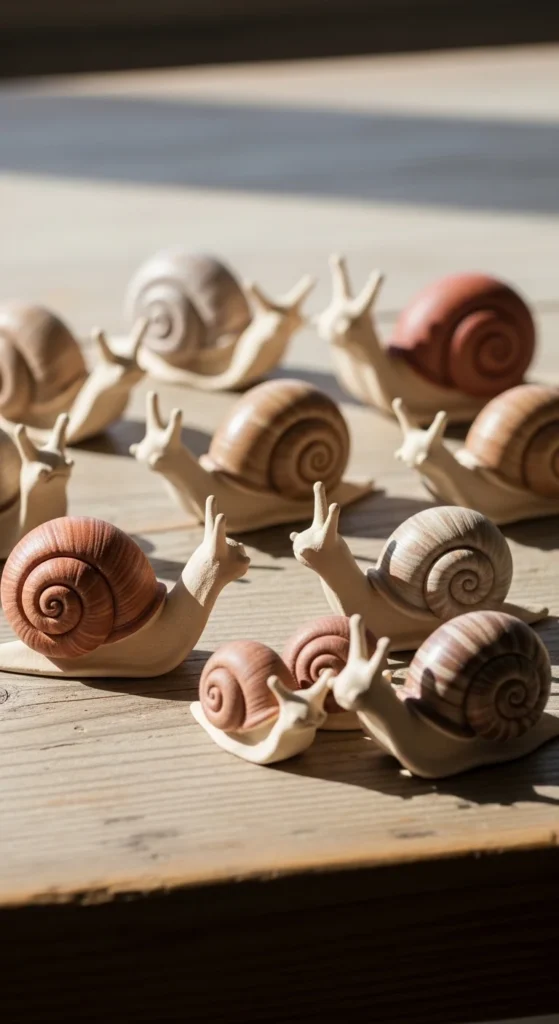
Snails are easy because they use coil shapes.
Roll a long clay rope. Spiral it for the shell.
Form a small oval for the body.
Insert a small pipe cleaner armature inside for support if needed.
Use damp fingers to smooth.
Dry fully before painting.
Add small dots or pastel colors.
Cute, beginner-friendly animal craft.
4. Cookie Cutter Ornaments
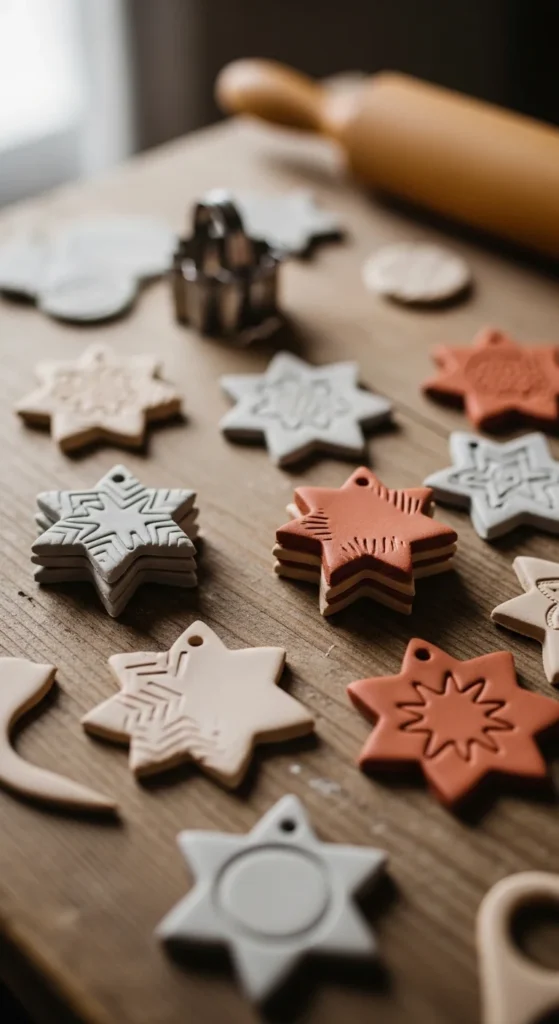
Roll clay thin and even.
Press cookie cutters firmly to cut shapes like stars or flowers.
Use a toothpick to pierce hanging holes before drying.
Mist lightly with water if clay dries too fast.
After drying, paint and seal.
Hang with string.
Quick and clean shaping method.
5. Clay Beads for Bracelets
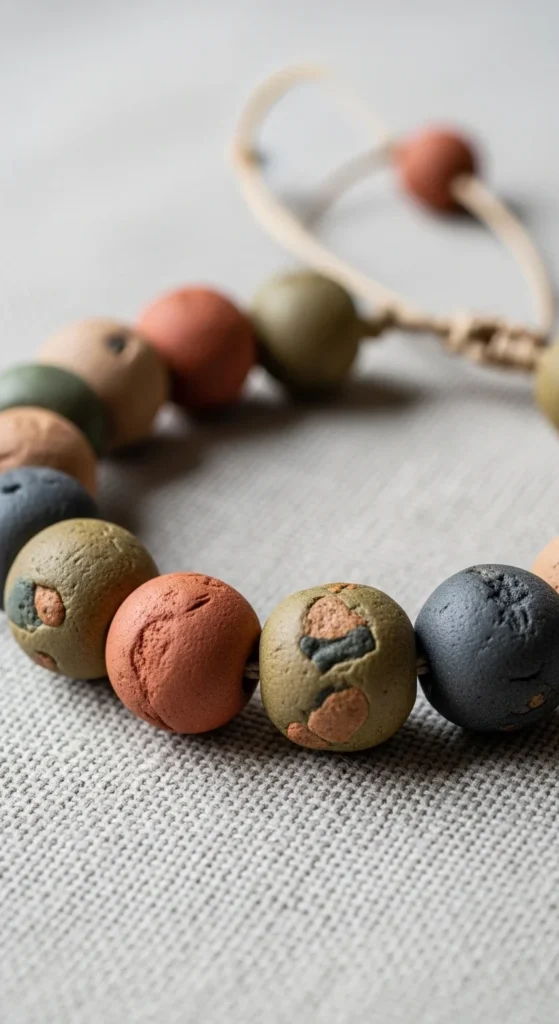
Roll small clay balls evenly.
Use a skewer to pierce holes.
Let dry completely before stringing.
Sand lightly for smooth edges.
Paint with acrylic markers or simple solid tones.
Seal for longer wear.
Affordable and wearable project.
6. Mini Succulent Planter
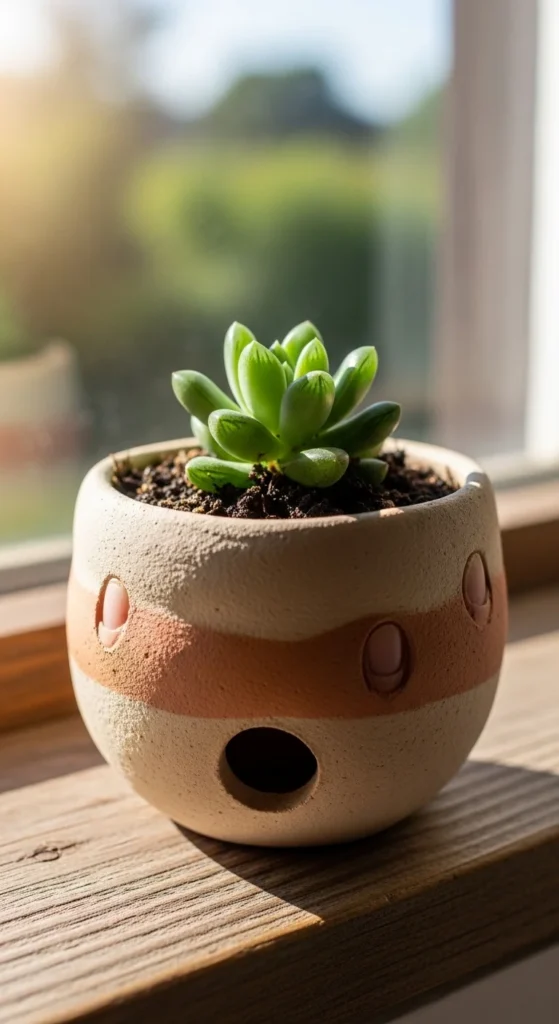
Roll a thick slab and shape into a small pot.
Use a bowl mold for structure.
Poke a drainage hole in the bottom.
Smooth seams with a sponge.
Dry slowly to reduce cracking.
Seal interior before planting.
Functional decor beginners can manage.
7. Clay Fridge Magnets
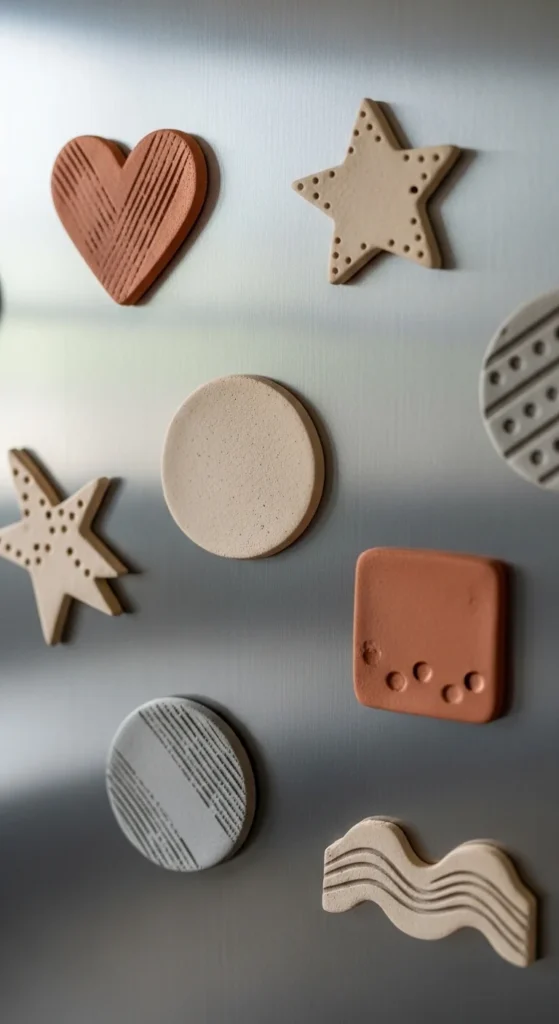
Cut small shapes from rolled clay.
Dry completely.
Paint and seal.
Glue magnet discs on the back.
Keep pieces small and lightweight.
Practical and easy.
8. Marbled Clay Tags
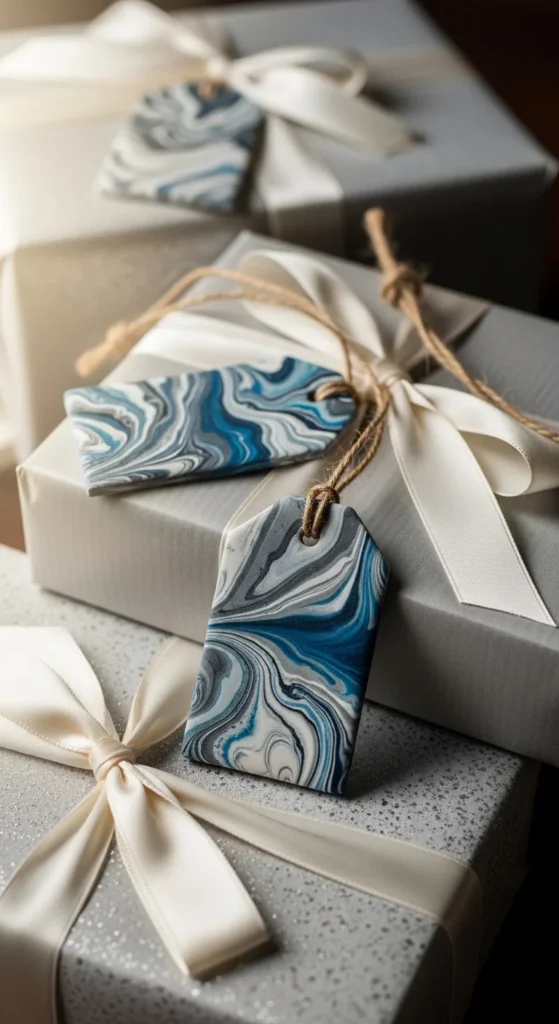
Mix two clay colors lightly.
Roll flat without over-mixing.
Cut small tag shapes.
Stamp names before drying.
Pierce hole for ribbon.
Seal after painting if needed.
Simple personalization idea.
9. Flower Frog Insert
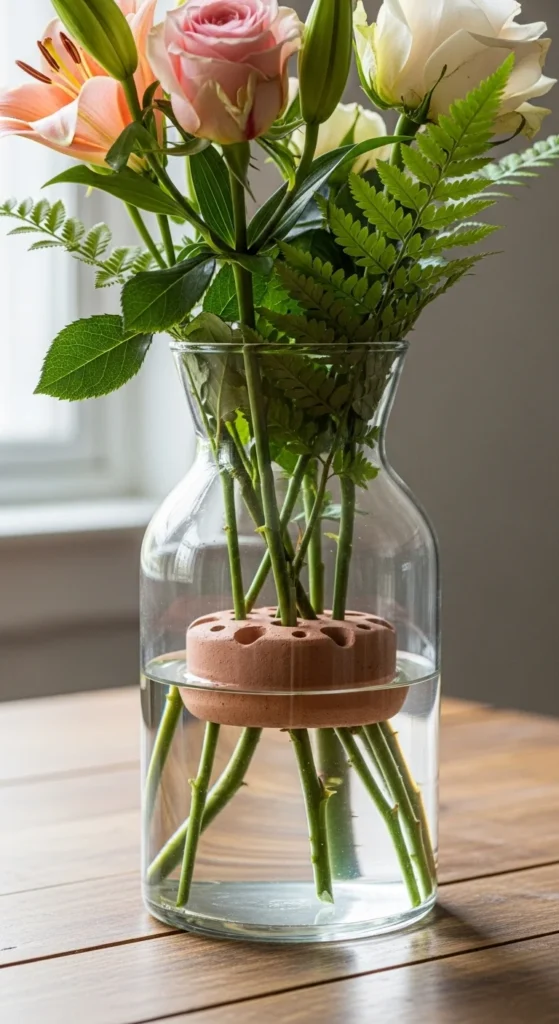
Roll a thick disc of clay.
Poke evenly spaced holes.
Let dry flat.
Place inside vase to hold stems upright.
Practical and unique beginner craft.
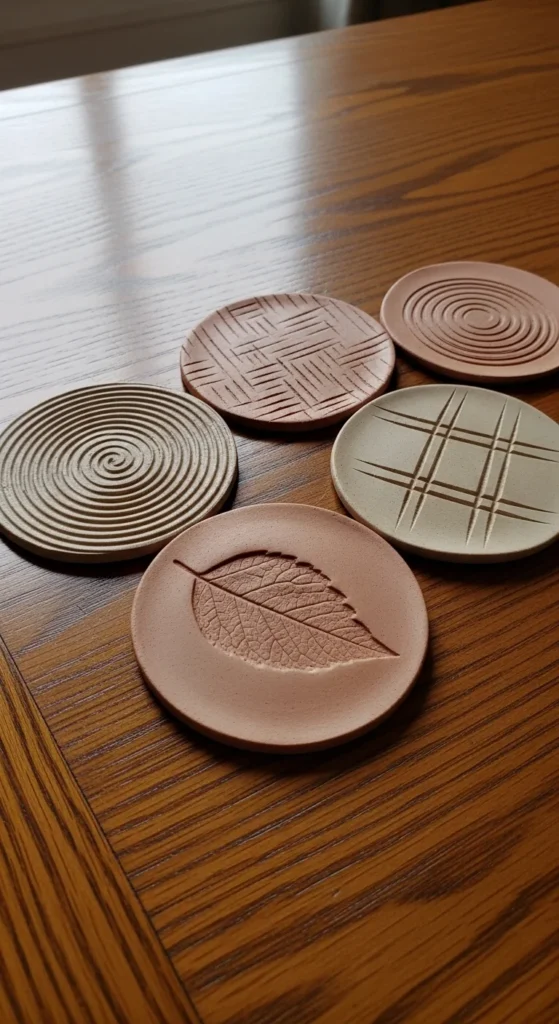
10. Pressed Leaf Wall Tile
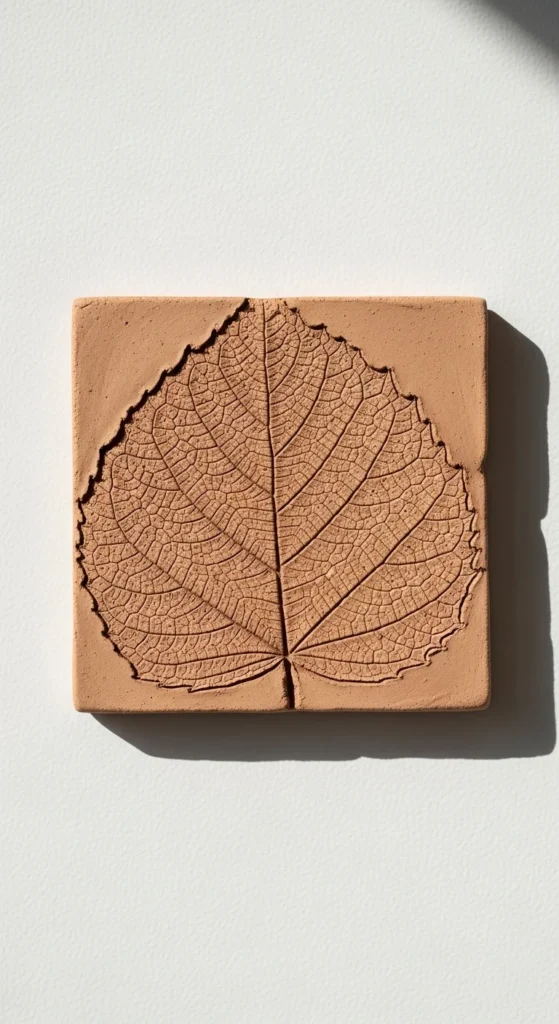
Roll clay evenly.
Press a real leaf into the surface.
Trim edges square.
Dry flat.
Paint lightly to highlight texture.
Seal for protection.
11. Clay Name Labels
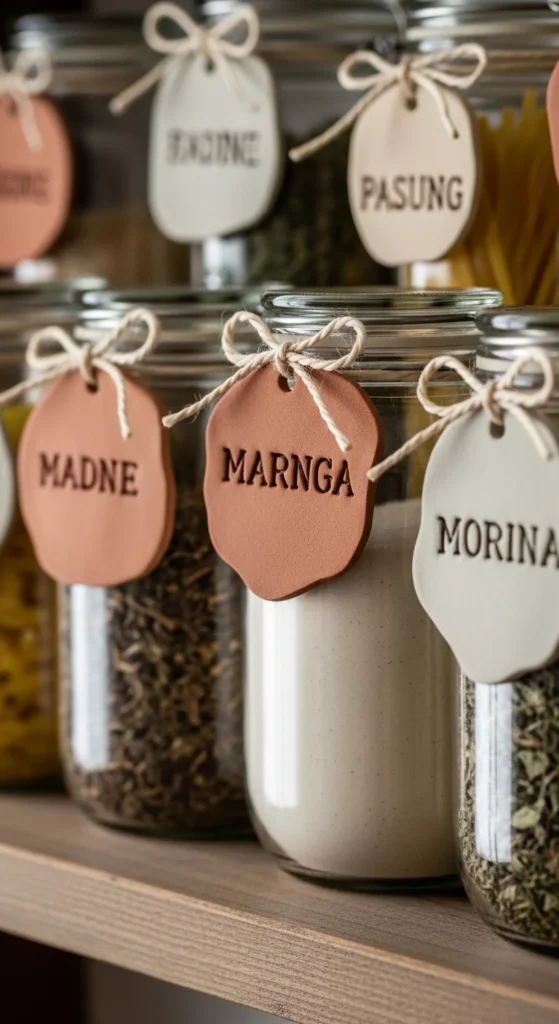
Roll thin slabs.
Cut rectangles.
Stamp letters before drying.
Pierce holes.
Paint or leave natural.
Attach with string.
Affordable organization tool.
12. Simple Heart Charms
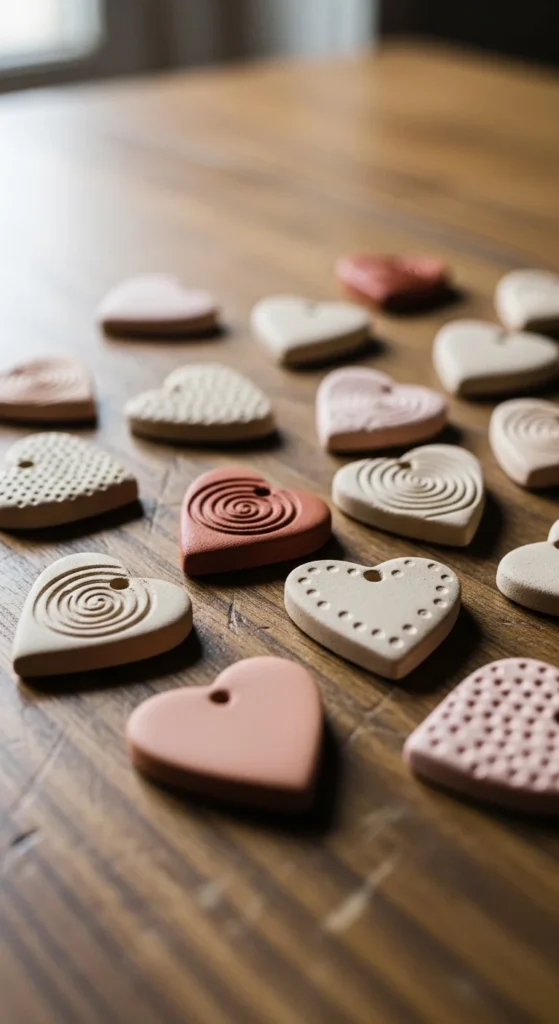
Shape small hearts by hand.
Use damp fingers to smooth edges.
Pierce a hole for string.
Dry fully.
Paint with soft colors.
Seal lightly.
Quick gift idea.
13. Clay Incense Holder
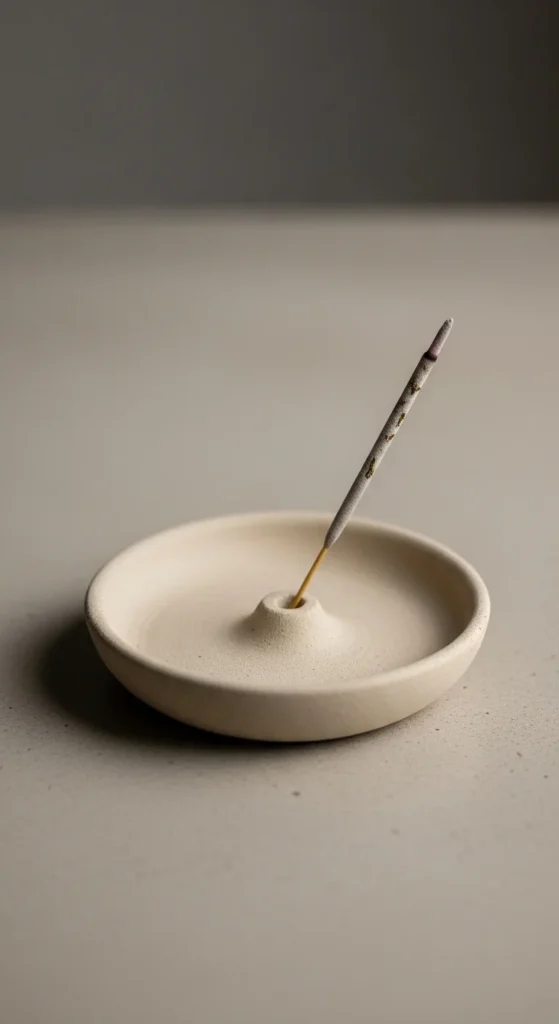
Roll a small disc.
Poke angled hole for incense stick.
Keep shape simple.
Sand after drying.
Seal lightly.
Uses very little clay.
14. Textured Clay Bowls
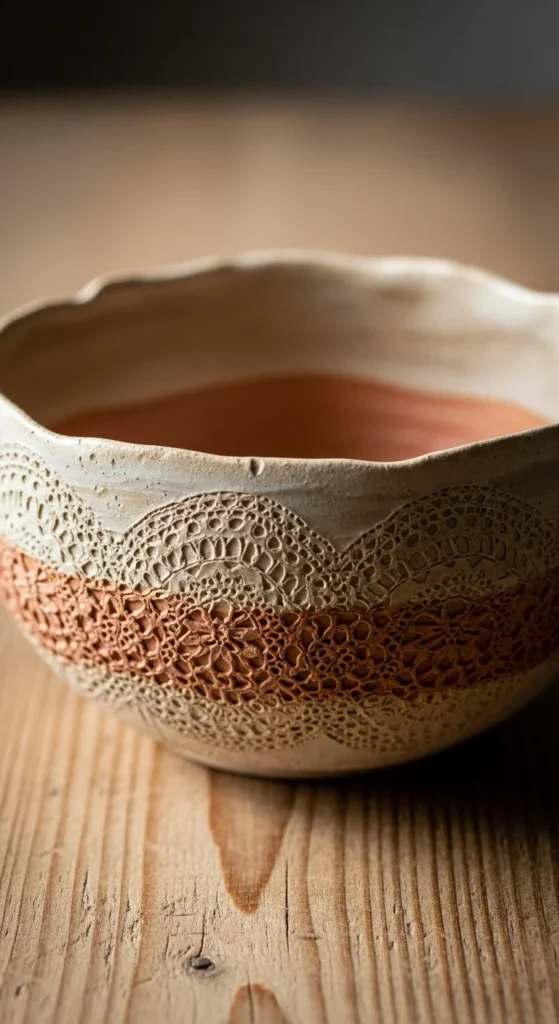
Roll clay flat.
Press lace for pattern.
Drape over bowl to form curve.
Dry completely.
Seal after painting.
Simple decorative bowl.
15. Clay Keychains
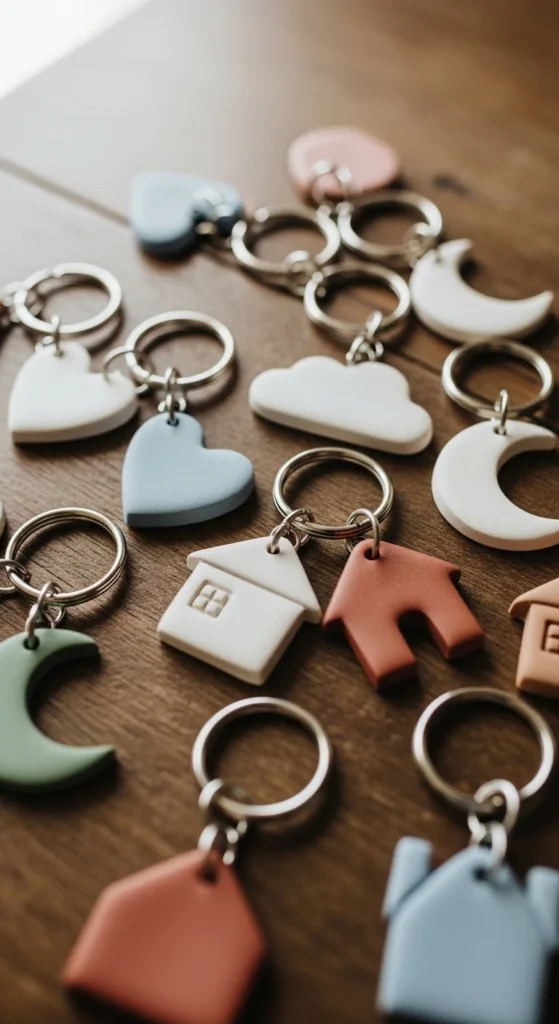
Cut small shapes.
Pierce hole before drying.
Paint and seal.
Attach key ring.
Great beginner batch project.
16. Clay Wall Hooks
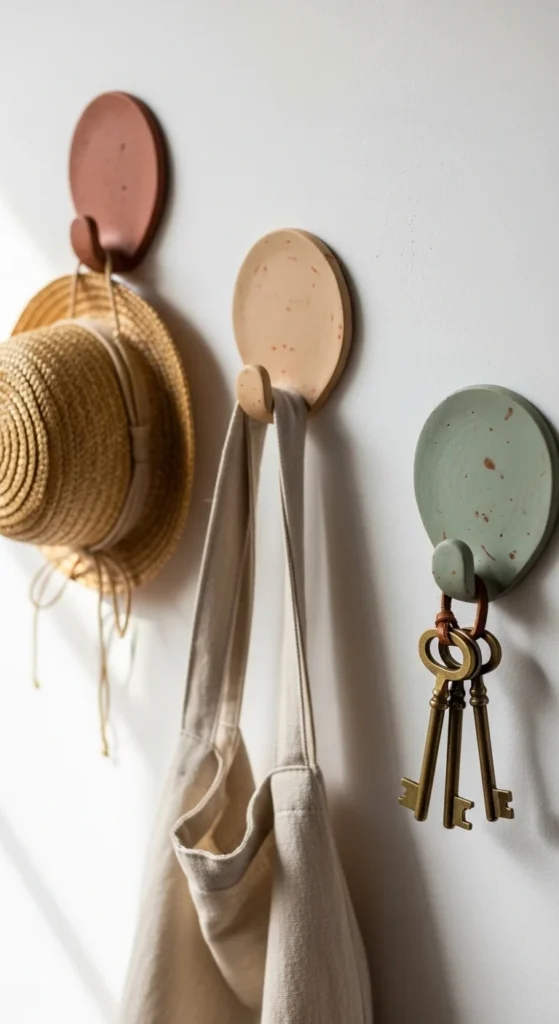
Shape rounded hook base.
Insert screw hardware carefully.
Dry fully.
Seal surface.
Low-cost decor upgrade.
17. Clay Game Tiles
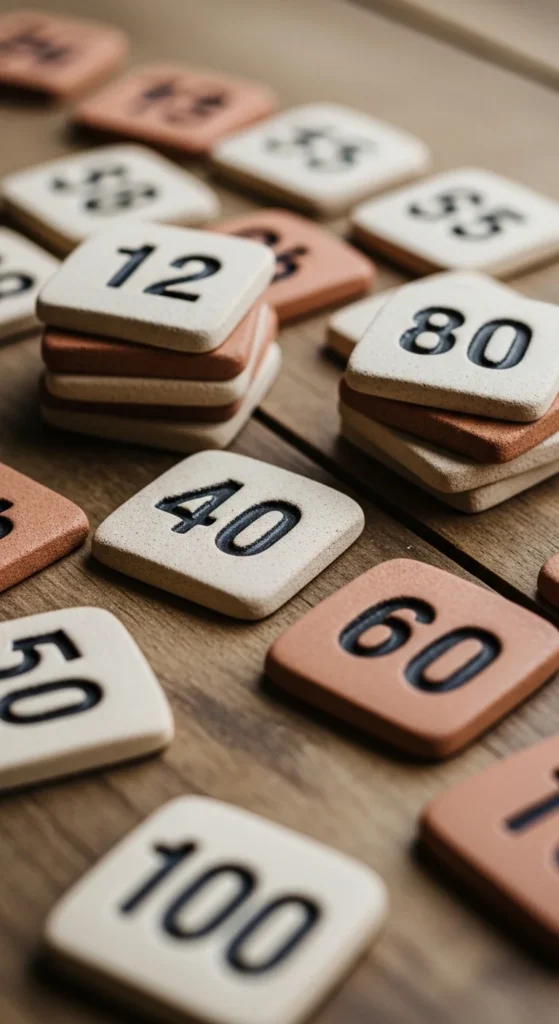
Roll even slab.
Cut square pieces.
Stamp numbers before drying.
Paint after dry.
Seal for durability.
Fun handmade game set.
18. Marbled Ring Holder Cone
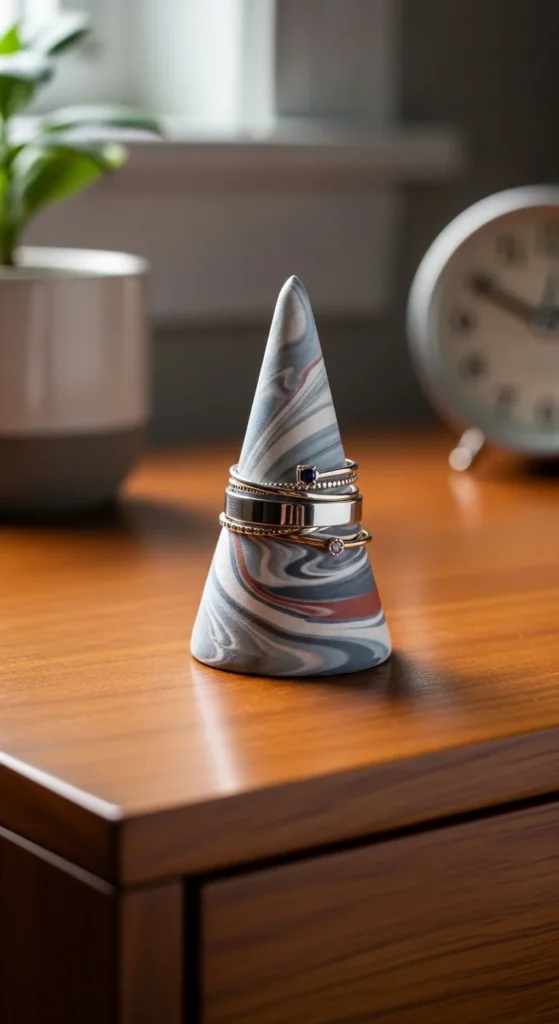
Roll cone shape evenly.
Mix colors lightly for swirl effect.
Dry upright.
Sand edges gently.
Seal surface.
Practical and stylish.
19. Clay Drawer Knobs
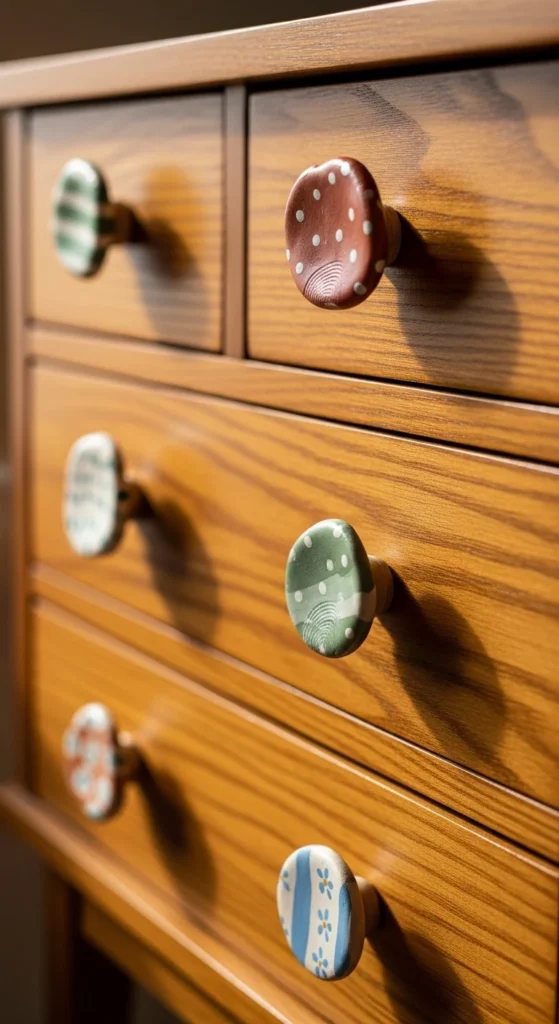
Form small rounded shapes.
Insert screw hole before drying.
Let dry fully.
Seal for durability.
Budget-friendly furniture update.
20. Kawaii Animal Figures
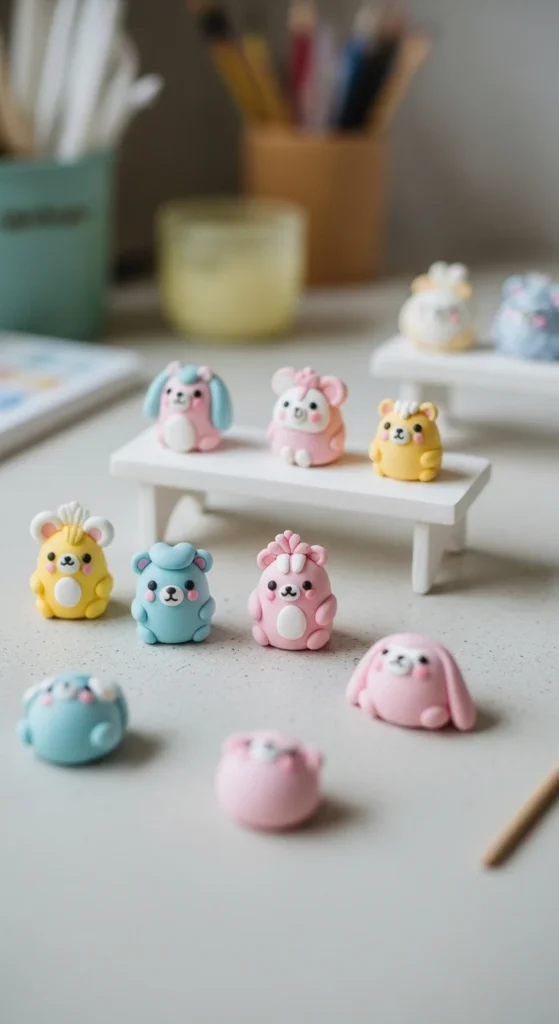
Start with simple shapes.
Use pipe cleaner inside for support.
Keep designs basic.
Dry slowly.
Paint with soft tones.
Fun for kids and beginners.
21. Pressed Flower Embeds
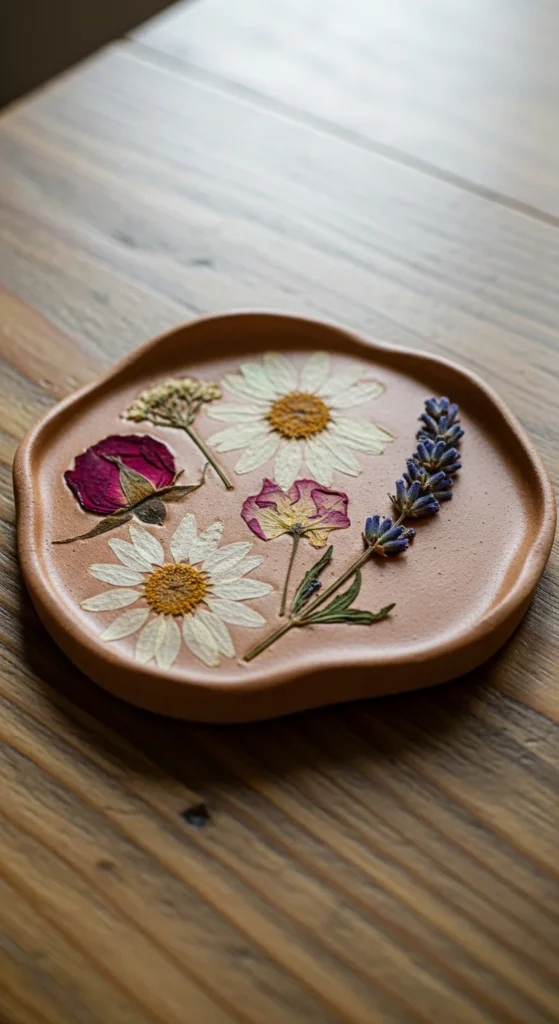
Roll thin slab.
Press dried flowers gently into clay.
Let dry flat.
Seal carefully with varnish.
Delicate decorative touch.
22. Clay Photo Holder Base
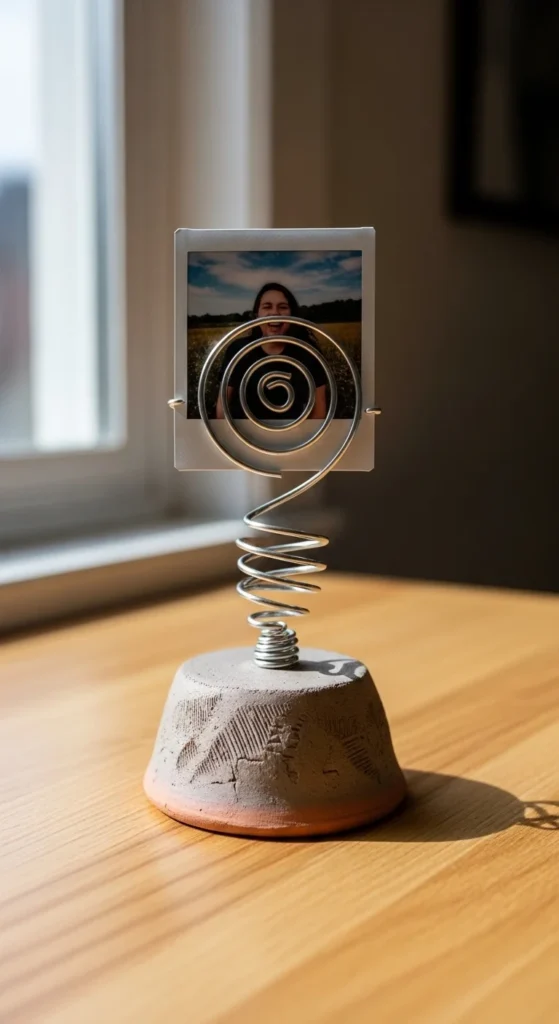
Shape small base.
Insert curled wire before drying.
Let dry completely.
Paint or leave neutral.
Simple desk decor.
23. Clay Storage Tray
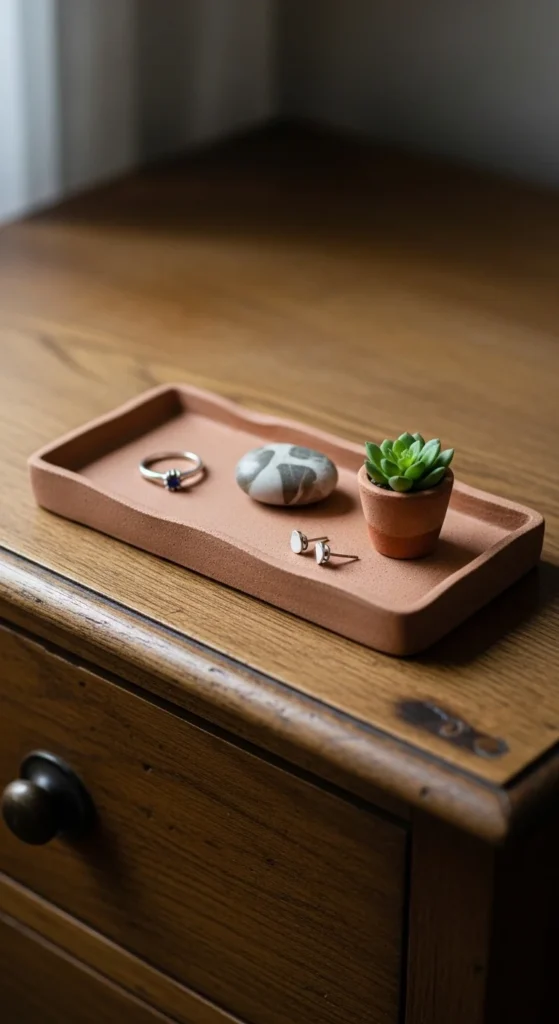
Roll slab evenly.
Trim into rectangle.
Smooth edges with sponge.
Dry flat.
Seal for durability.
Organizes small items.
24. Mini Balloon Mold Bowl
Cover half balloon with clay.
Let dry partially.
Pop balloon carefully.
Trim edges smooth.
Seal surface.
Fun shaping method.
25. Clay Letter Magnets
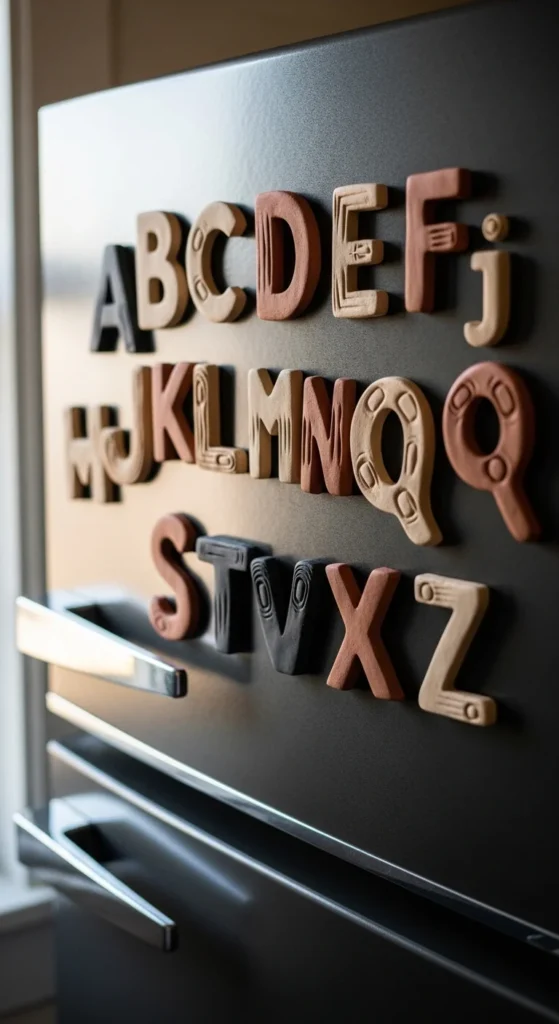
Roll clay thin.
Cut letter shapes.
Dry fully.
Paint bright colors.
Glue magnets on back.
Functional and creative.
Conclusion
Air dry clay is perfect for beginners because it requires no kiln and minimal tools. With damp hands, a sponge, simple cutters, and seal varnish, you can create functional decor, small gifts, and playful crafts at home. Start with a trinket dish or coaster, practice smooth edges and even slabs, and build from there. Small steps lead to confident crafting.


