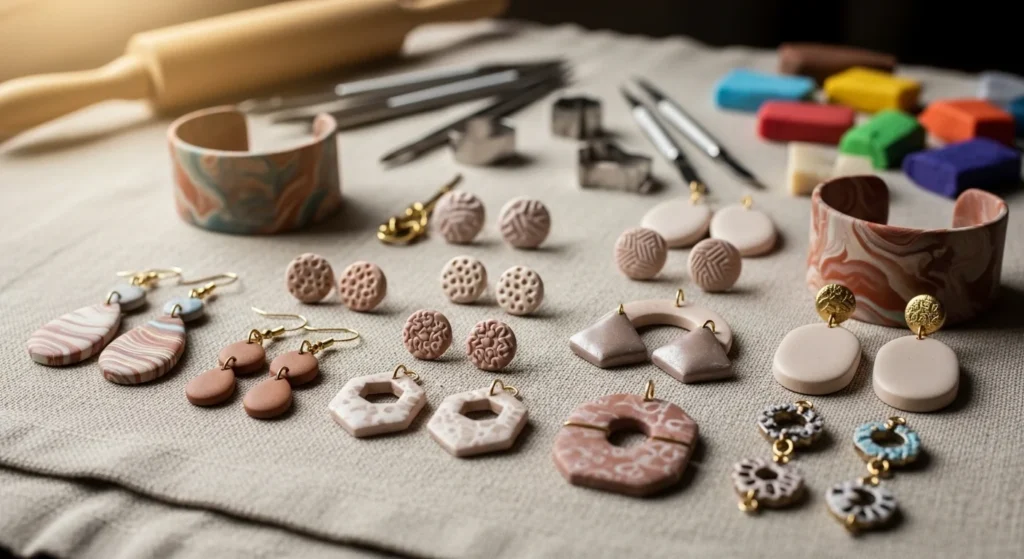
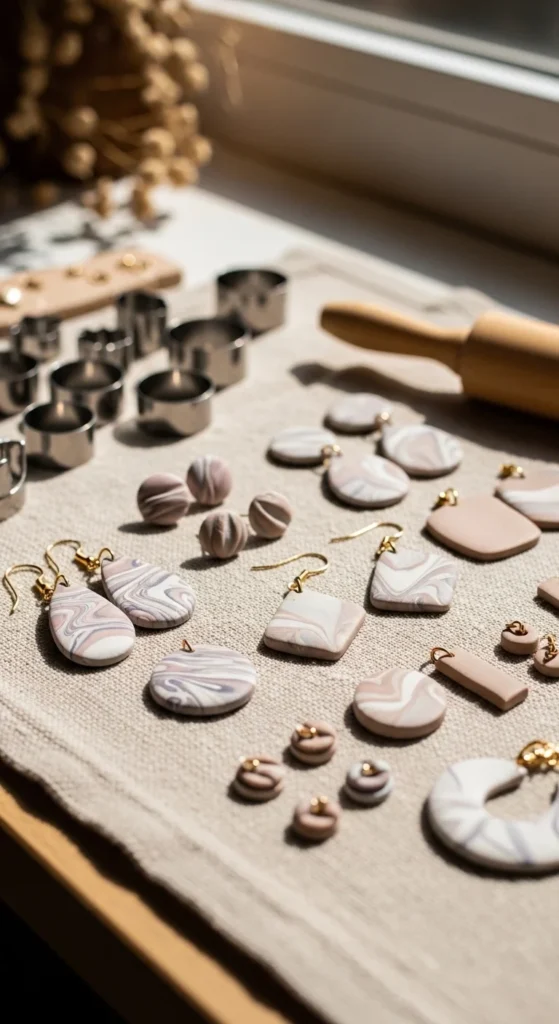
Clay jewelry is a fun way to make pieces that look like they came from a small boutique. You can keep the designs simple and still get a polished result. The secret is good shape, clean edges, and smart finishing. Polymer clay is popular because it cures light and strong. Air dry clay works too, especially for chunky pendants and charm styles. You don’t need expensive tools. A rolling pin, blade, cookie cutters, and basic hardware can take you far. The ideas below focus on styles people actually wear right now, like marbled drops, nature motifs, and bold color blocks. Pick one design and repeat it in a small color set for a matched collection.
1. Ombre Marbled Drop Earrings
Ombre marbling gives that stone-like look people love. Start with two or three colors that fade nicely. Roll each color into a thin snake. Place them side by side. Twist gently. Then fold once or twice. Stop before the colors mix too much.
Roll the sheet to an even thickness. Use a teardrop cutter for clean shapes. Smooth edges with a fingertip. Poke holes before baking so they stay neat.
Budget tip: Use tiny leftover bits to create mini matching studs. This helps you use every scrap.
After curing, sand the back lightly so it sits flat. Add a satin finish for a soft shine. Pair with simple gold-tone findings for a clean look. These earrings work for everyday outfits and dressier looks.
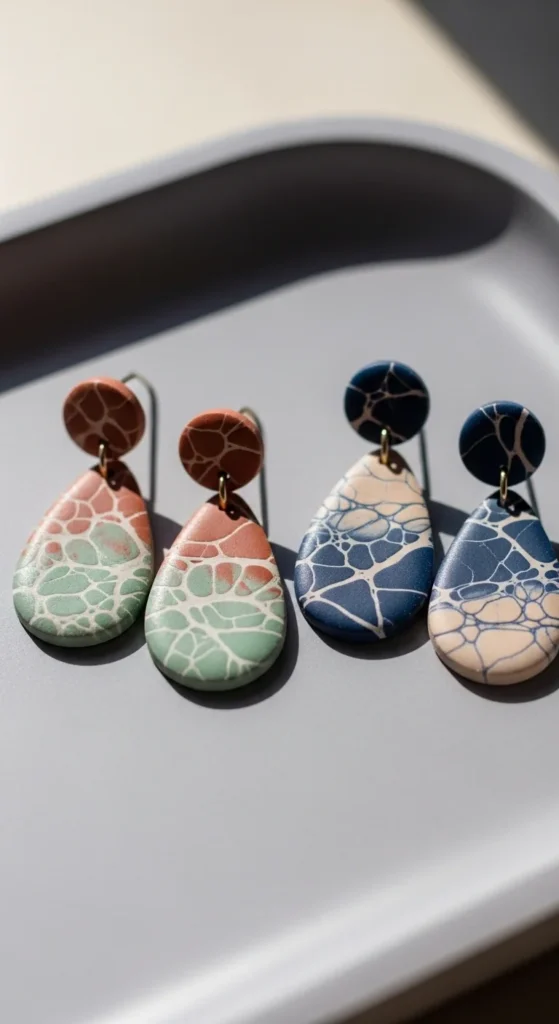
2. Faux Agate Circle Dangles

Faux agate is all about layers. Use translucent clay with small streaks of color. Make thin sheets. Stack them like a sandwich. Then slice cross-sections to reveal the pattern.
Cut circles with a cutter. Keep pairs matched by cutting from the same slice. Smooth the edges so they look finished.
Budget tip: Make a whole tray of slices first. Then cut multiple shapes at once. It saves time.
Bake and let cool fully. Add jump rings so the circles move. Keep hardware simple so the pattern stays the focus. If you want extra shine, add a thin glaze. These look expensive but cost very little to make.
3. Lace-Pressed Stud Earrings
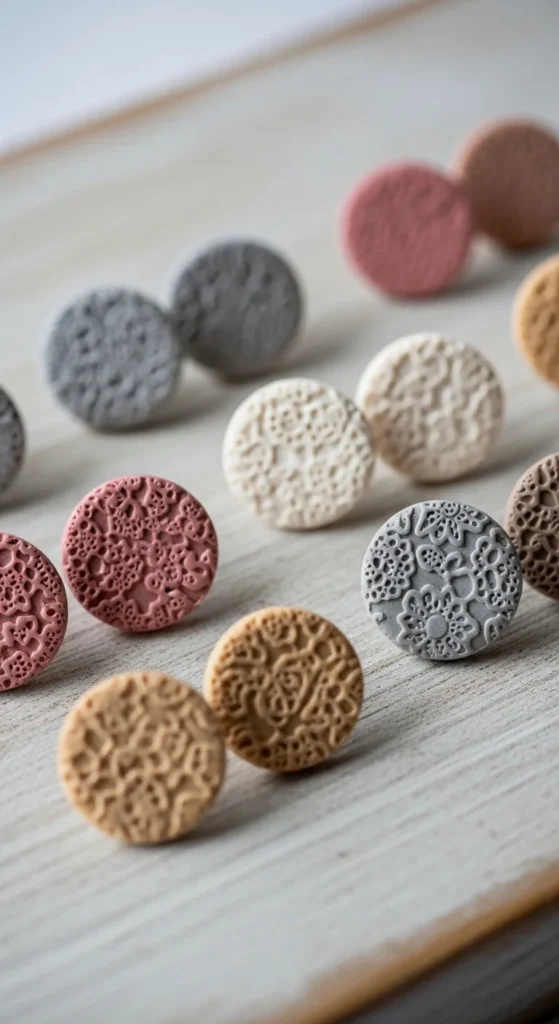
Lace texture instantly adds detail. Roll clay to a medium thickness. Press lace fabric lightly into the surface. Peel it off carefully. The pattern stays crisp.
Cut small circles or hearts. Add a tiny dome shape for a softer look. Bake as normal.
Budget tip: Use old lace trim from fabric scraps. You don’t need anything fancy.
After baking, sand the backs flat. Glue posts securely. Let the adhesive cure fully before wearing. Keep colors simple like cream, blush, or warm tan. These sell and gift well because they match almost everything.
4. Leaf-Imprint Oval Drops
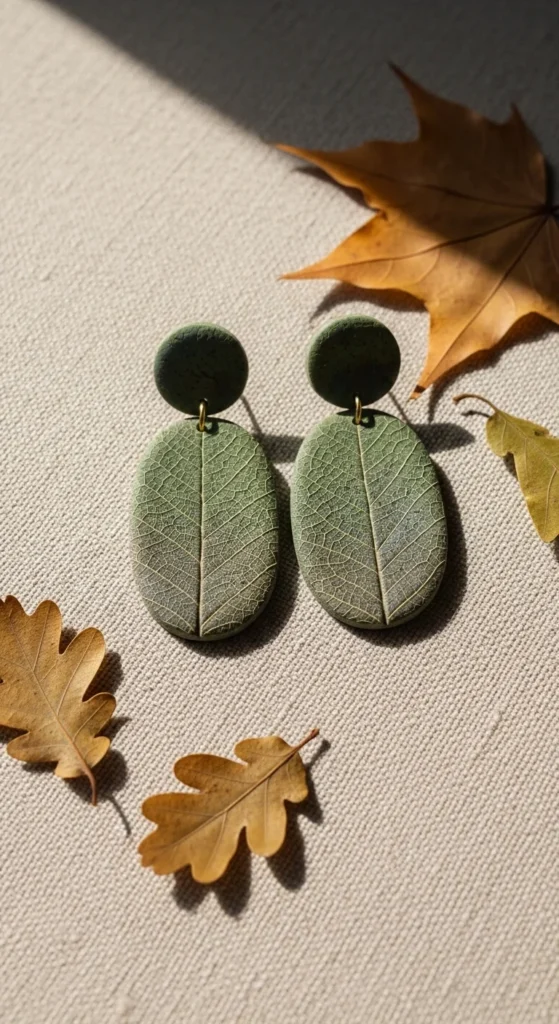
Nature textures feel handmade in the best way. Pick a leaf with visible veins. Roll clay. Press the leaf in. Lift it slowly to keep the details.
Cut oval shapes. Add a small top connector piece. Poke holes for jump rings before baking.
Budget tip: Use leaves from your yard. Try a few types and choose the clearest imprint.
After curing, dry-brush a lighter paint over the raised veins. This highlights detail without heavy coloring. Seal lightly so the texture stays visible. These look great with simple outfits and cottagecore styles.
5. Tiny Mushroom Charm Earrings
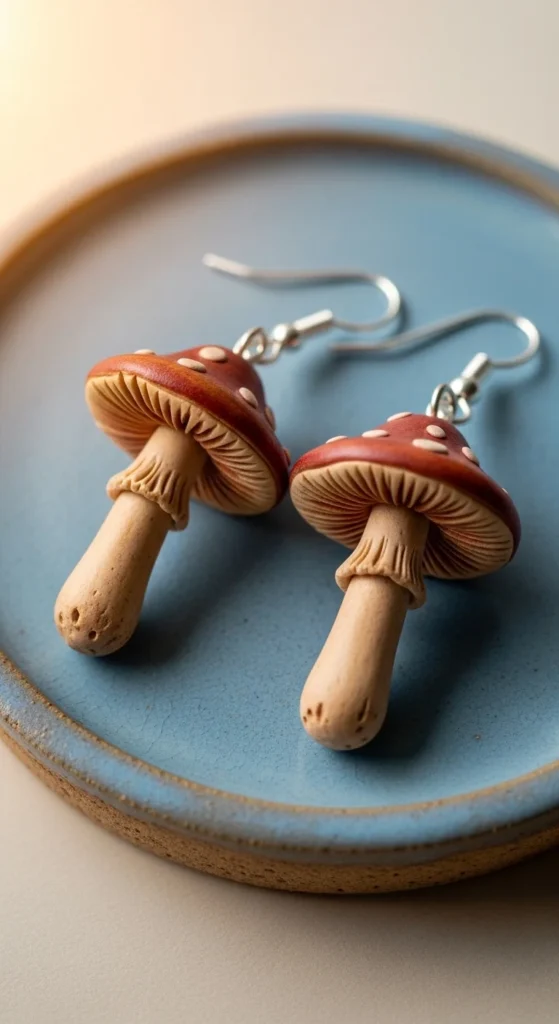
Mushrooms are trending and easy to sculpt. Roll a small stem and a round cap. Press them together gently. Add tiny dots using a toothpick.
Bake the charms. Then attach them to small hoops or stud findings.
Budget tip: Make a set of 10 mushrooms in one sitting. Repetition makes them cleaner and faster.
Paint subtle shading after baking. Use muted reds, creams, or earthy browns. Add a satin topcoat. These make playful gifts and look great in fall.
6. Bee Honeycomb Stud Set
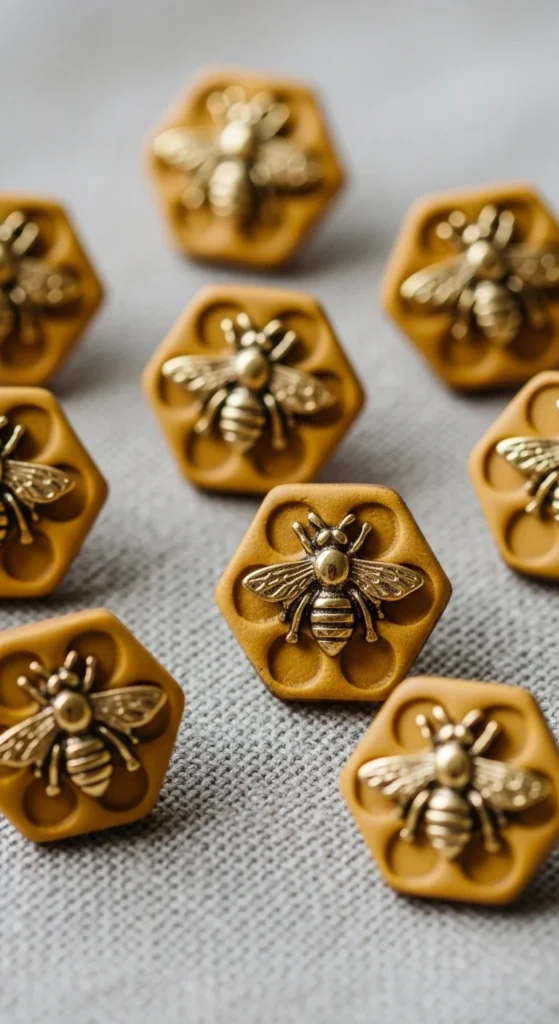
Honeycomb shapes are sharp and modern. Cut small hexagons using a cutter. Add tiny bead-like details for texture. For a bee accent, add a tiny oval body and two little wings.
Budget tip: Make simple honeycomb studs and add the bee to only a few pairs. You get variety from one batch.
Bake and then add a light metallic powder on raised areas. Seal gently. Pair with gold-tone posts. These feel cute but still grown-up.
7. Geometric Hexagon Dangles
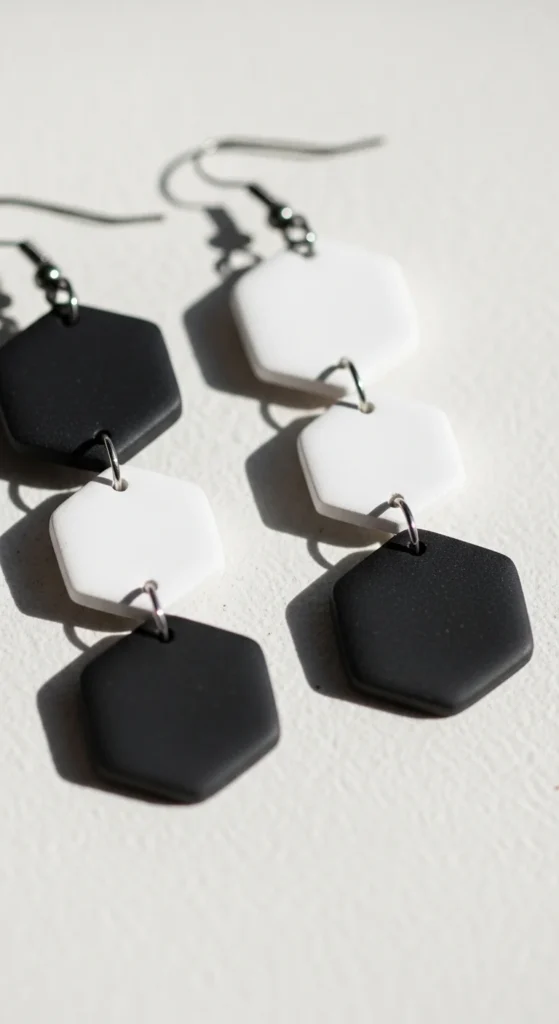
Geometric earrings feel modern and clean. Roll clay evenly. Use hexagon cutters. Keep edges crisp by cutting straight down and lifting cleanly.
Use two-tone blocks by joining two colors side by side, then rolling lightly to fuse. Don’t over-roll or the seam will smear.
Budget tip: Use cookie cutters instead of fancy cutters. They work well for simple geometry.
Bake and assemble with jump rings for movement. Keep hardware consistent across your set for a boutique look.
8. Teardrop Color-Block Earrings
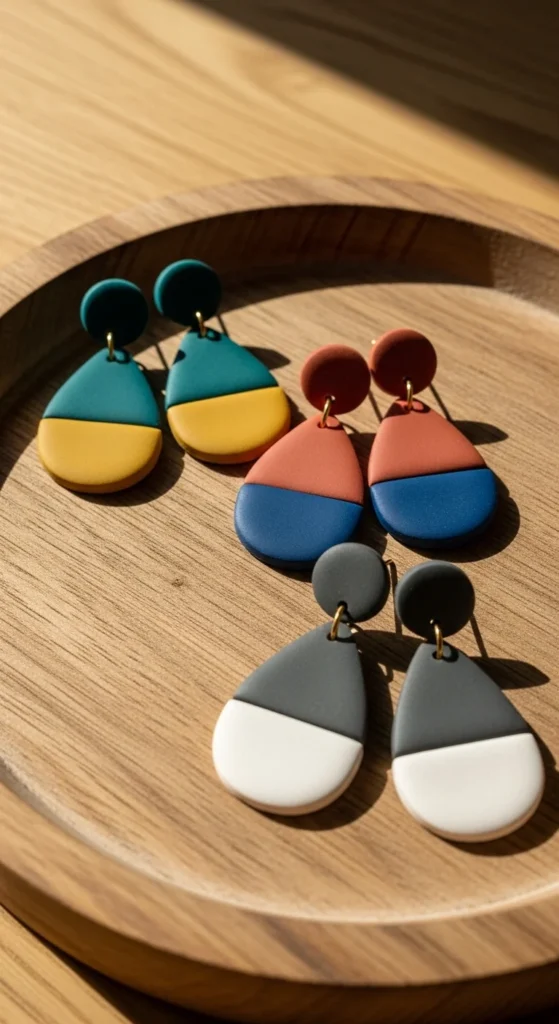
Color blocking is bold but easy. Create two flat sheets in contrasting colors. Cut a teardrop base. Add a smaller half shape on top.
Smooth the seam using gentle pressure. Use a blade to trim edges cleanly.
Budget tip: Use small offcuts for the top layer pieces.
Bake and finish with a satin glaze. Keep the shape simple so the color does the work. These are great for statement outfits.
9. Minimal Knotted Hoop Earrings
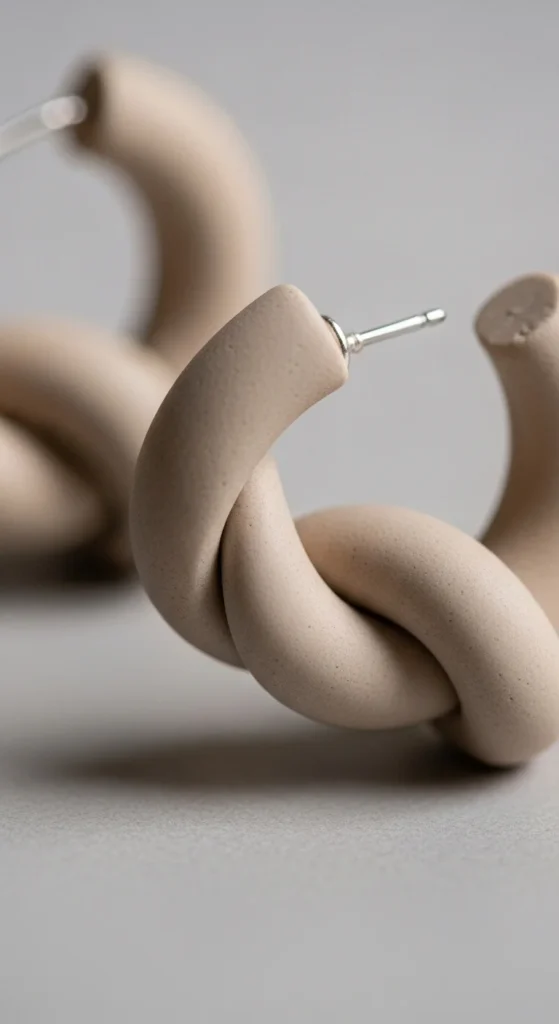
Knotted shapes look sculptural without complicated cuts. Roll two thin clay ropes. Cross them once. Press gently to form a knot. Shape into a small hoop.
Keep the knot centered. Smooth rough spots with a fingertip.
Budget tip: Use one neutral color and make multiple sizes. It looks like a mini collection.
Bake and attach hoops or posts. A matte finish looks very modern here. These are comfortable and lightweight.
10. Stamped Texture Arch Earrings
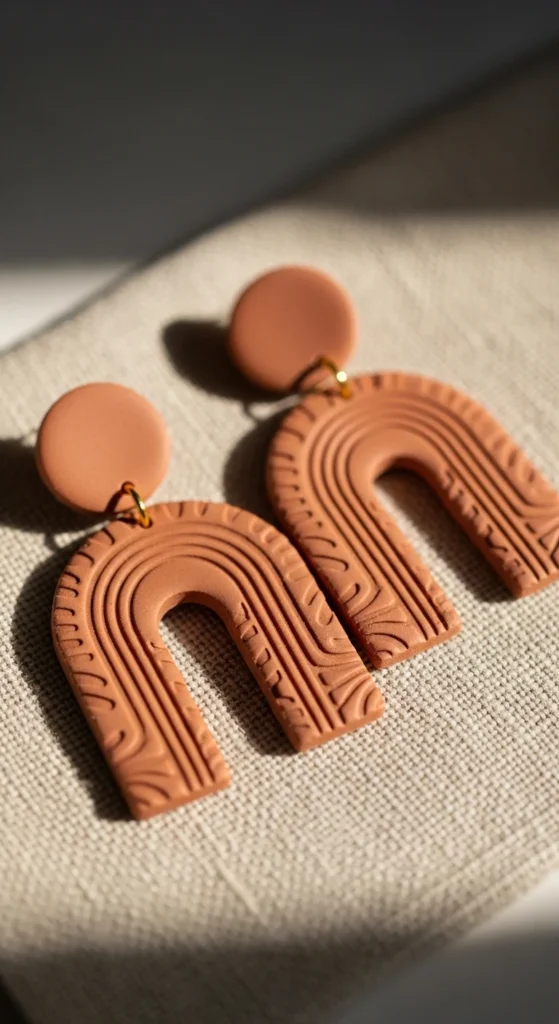
Arch shapes are popular and easy. Roll clay. Stamp the surface using a simple texture tool or rubber stamp. Cut arches with a cutter.
Keep thickness even. Poke holes for jump rings.
Budget tip: Use household textures like woven fabric or a textured mat.
After baking, lightly sand edges. Add a thin glaze. Pair with simple hooks. These arches look clean and stylish.
11. Metallic Edge Outline Earrings
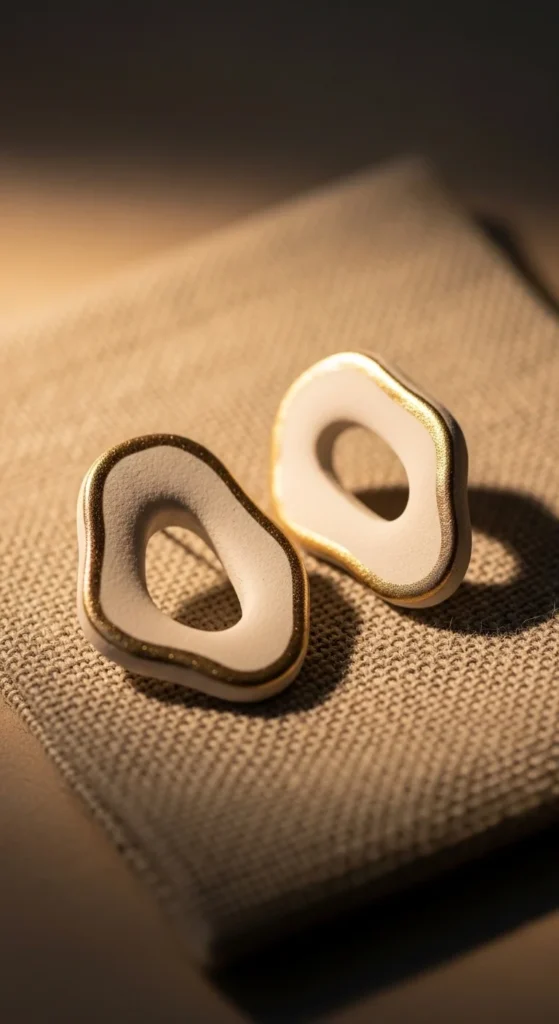
Metallic edging makes simple shapes look premium. Cut clean shapes like ovals or circles. Bake first. Then paint only the edges with metallic paint.
Budget tip: One small metallic paint bottle lasts a long time.
Seal after paint dries. Keep the main body color matte so the edge stands out. These feel boutique without extra work.
12. Mirror-Inset Stud Earrings
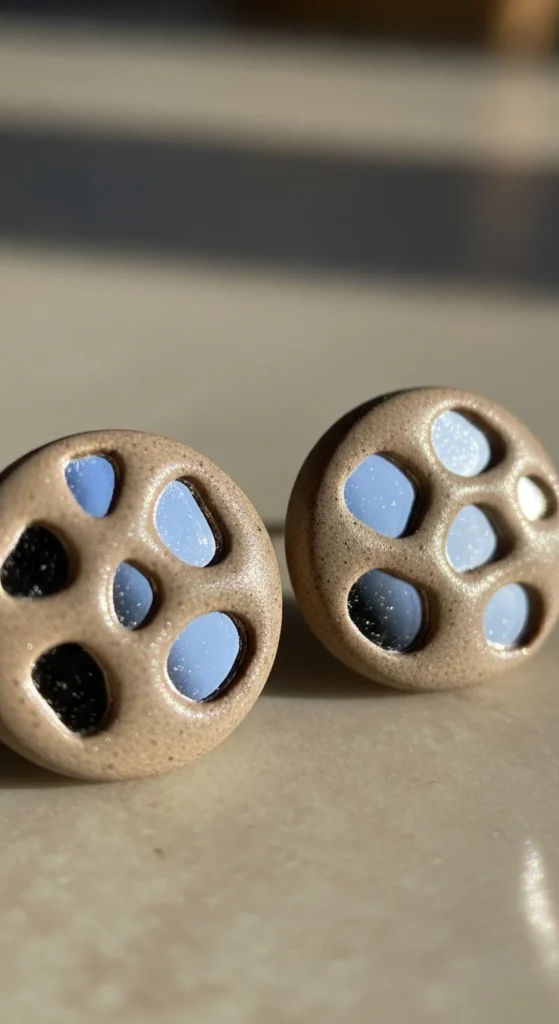
Mirror insets create sparkle. Make a flat stud base. Press a tiny mirror piece into the clay gently. Make sure it sits flush.
Bake carefully so the mirror stays stable. After cooling, seal around the edges.
Budget tip: Use broken mirror tiles cut into tiny shapes.
Keep the design simple. The reflection does the styling. These are unique and eye-catching.
13. Pearl + Clay Drop Earrings
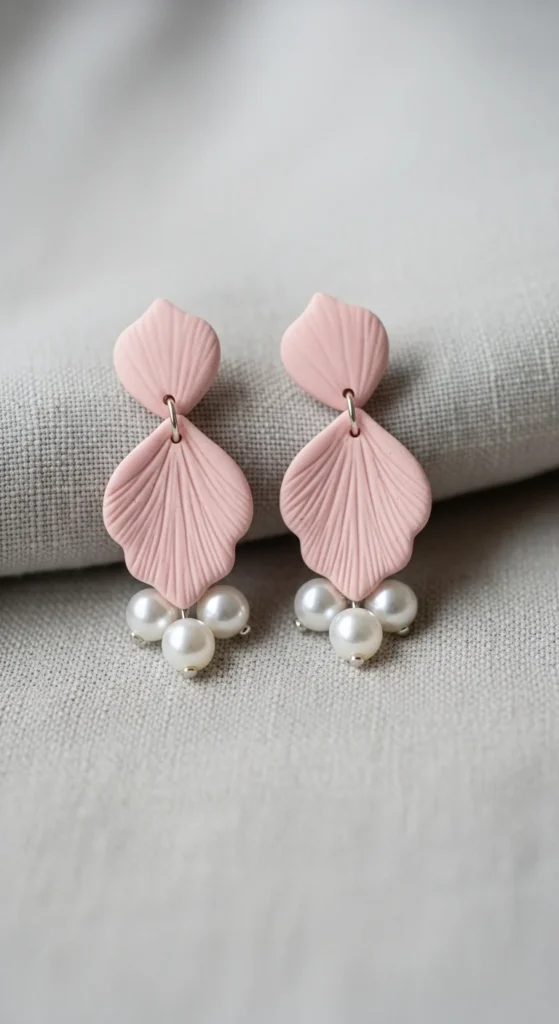
Pearl accents add softness. Create a clay drop shape. Attach a pearl bead using a headpin after baking.
Budget tip: Use faux pearls in bulk packs.
Choose colors like cream, blush, or sage. Keep the clay finish satin. This style looks refined and giftable.
14. Celestial Star and Moon Charms
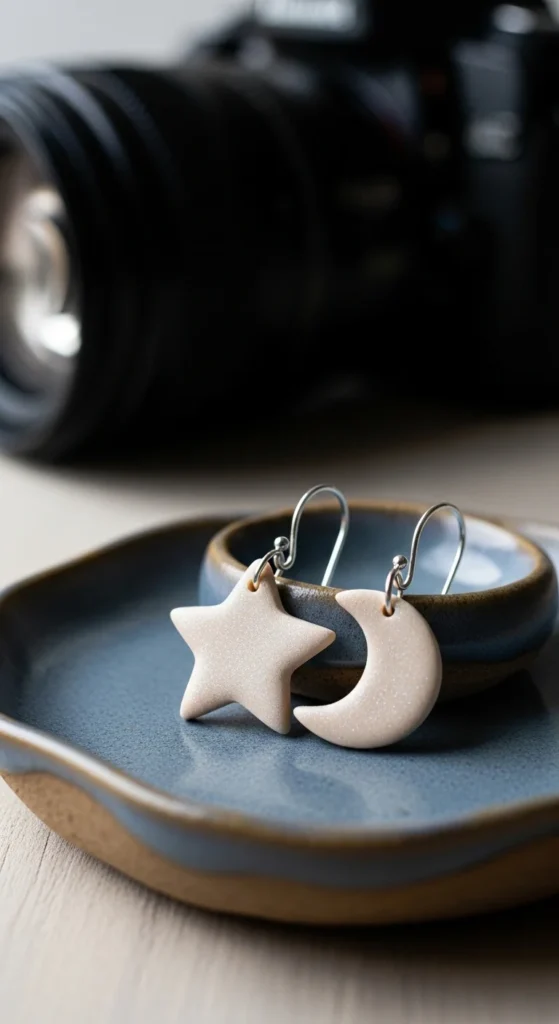
Stars and moons are playful and easy. Cut shapes with small cutters. Add tiny dots for texture.
Use a light shimmer powder for glow. Bake and assemble with small jump rings.
Budget tip: Make a mixed set and gift as a mini pack.
These charms work as earrings or necklace pendants too.
15. Alphabet Letter Studs

Letter studs are personal and simple. Cut letters using small cutters or hand-shape them. Keep edges clean.
Bake and then attach posts. Add a tiny gold dot or stripe for detail.
Budget tip: Make popular initials in bulk.
These are great for custom orders and gifts.
16. Nameplate Pendant Necklace
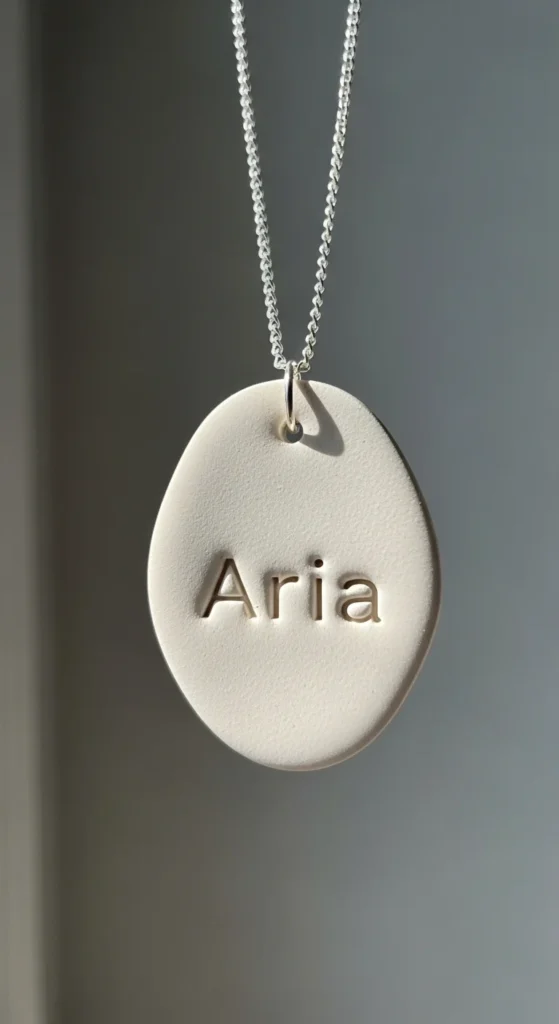
A nameplate pendant feels custom. Roll clay evenly. Cut a rectangle or soft oval. Press letter stamps to add a name.
Poke holes for the chain or attach a bail after baking.
Budget tip: Keep the base shape the same and change only the name.
Seal for durability. Use a simple chain so the pendant stands out.
17. Mosaic Tile Pattern Earrings
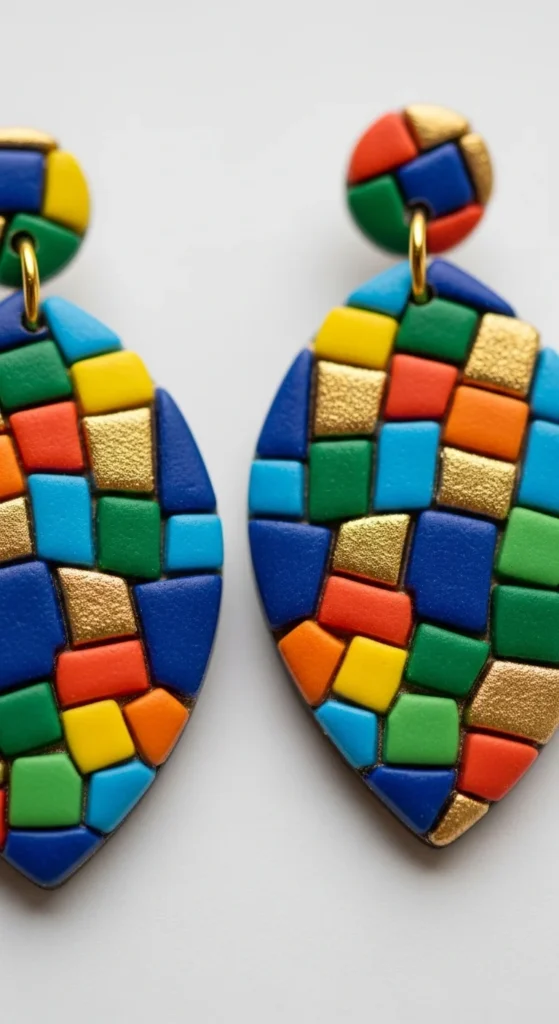
Mosaic designs look detailed but are built from small pieces. Cut tiny squares from different colors. Place them on a base sheet like a mini tile layout.
Press gently to fuse. Then cut final shapes.
Budget tip: Use scrap clay pieces for mosaic bits.
Bake and sand edges. A glossy finish helps the tiles pop.
18. Etched Snake Motif Pendants
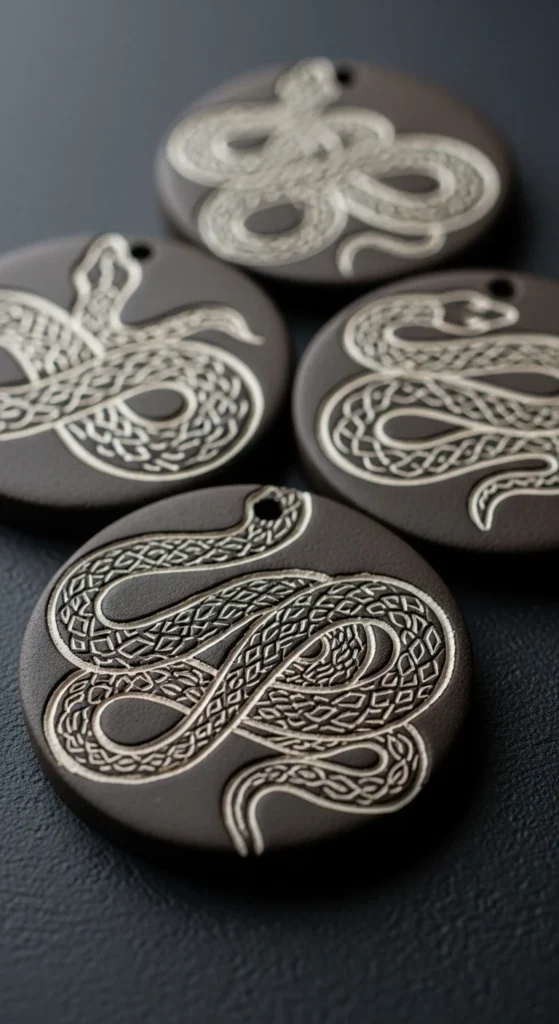
Etching creates an artistic look. Roll a dark clay slab. After cutting the pendant shape, carve a snake line design with a needle tool.
Dust a lighter pigment into the etched lines. Wipe the surface so only the lines remain.
Budget tip: Practice etching on small scraps first.
Seal lightly. Pair with a thin chain. This is edgy but wearable.
19. Dual-Tone Half-Moon Earrings

Half-moons are classic. Make a base sheet. Add a second color on one half. Trim straight with a blade for a clean split.
Cut the half-moon shape. Smooth the seam.
Budget tip: Use two colors you already have. No extras needed.
Finish with satin glaze. Add hooks. These look clean and modern.
20. Bold Checkerboard Dangles
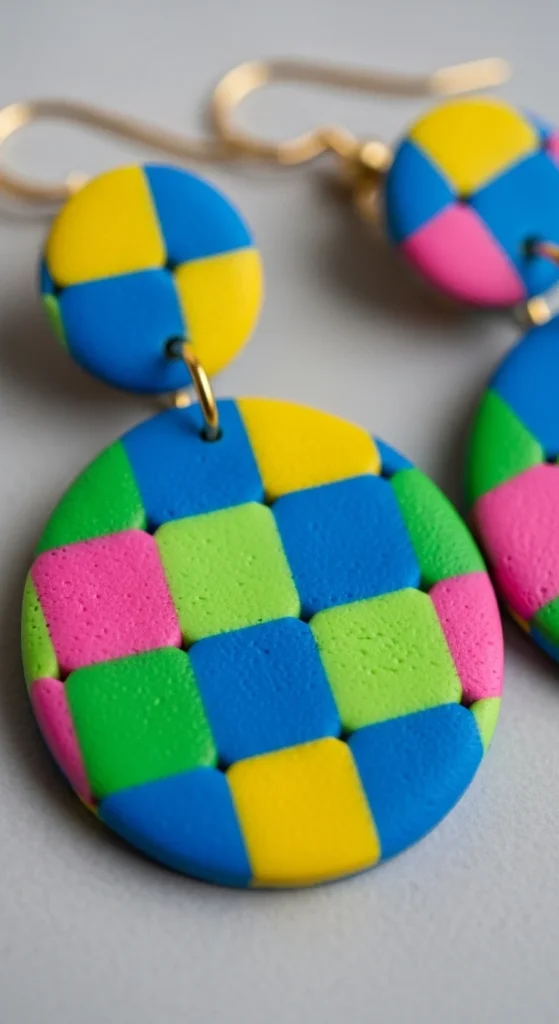
Checkerboards are trending and fun. Make a grid using small clay squares. Press into a base sheet.
Cut final shapes once the pattern is set. Keep edges sharp.
Budget tip: Use two colors only. It stays simple and striking.
Bake and seal. Pair with simple hardware.
21. Stacked Charm Layer Necklace
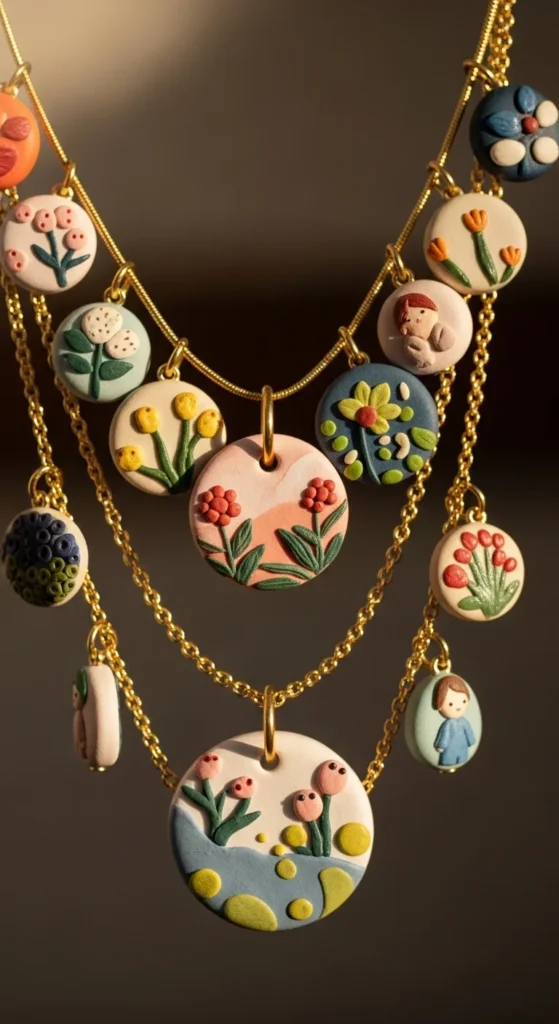
Layering looks boutique. Make small charms like stars, hearts, or mini leaves. Bake them and assemble with jump rings onto one chain.
Mix sizes for balance. Keep colors within one palette.
Budget tip: Use leftover clay for tiny charms.
Seal charms and use a simple chain. This creates a stylish layered look.
22. Textured Cuff Bracelet
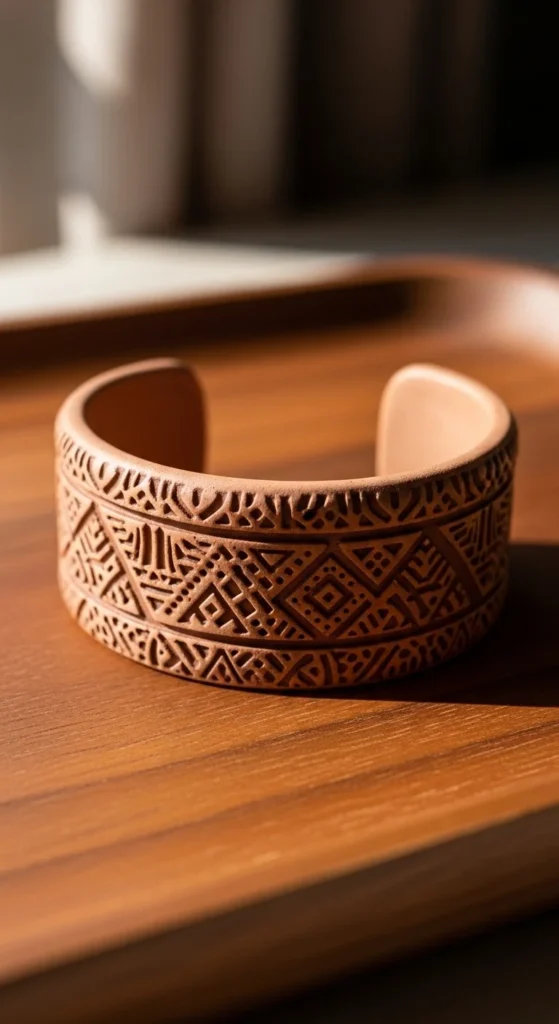
Cuffs can be lightweight and bold. Roll a thick strip. Wrap it around a jar to shape. Add texture using stamps or lace.
Bake on a form so it keeps shape. After cooling, sand edges smooth.
Budget tip: Make one cuff and match it with small earrings using the same texture.
Seal for durability. This feels like boutique arm candy.
23. Marble Swirl Bangle Accent
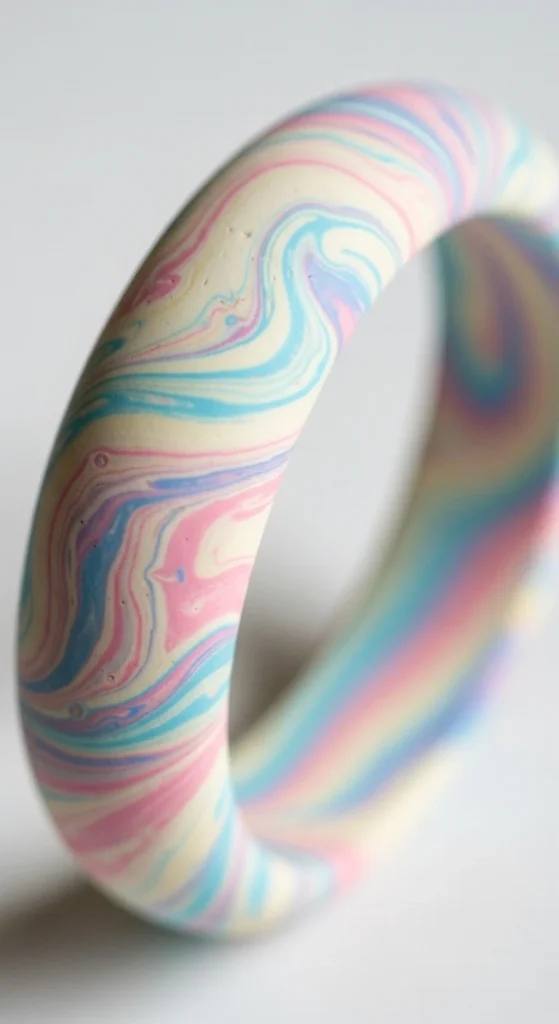
For a bangle look, create a clay strip and wrap around a round form. Use marbled clay to mimic stone.
Keep seams hidden on the inside. Bake carefully.
Budget tip: Make smaller bangles for kids or as bag charms too.
Seal with satin finish. These stand out in photos.
24. Metallic Speckle Studs
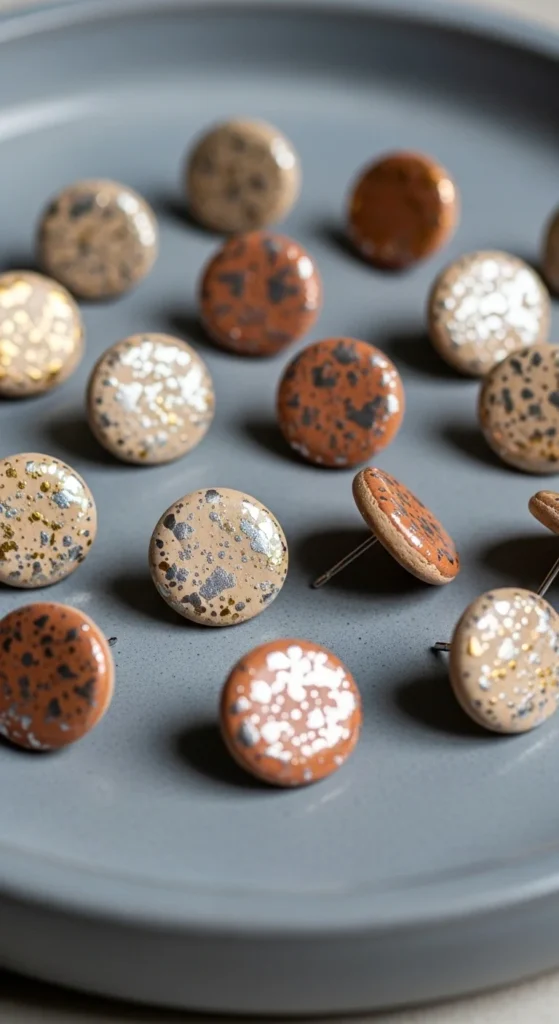
Metallic speckles create sparkle with minimal effort. Roll clay and cut small shapes. Bake first. Then add metallic paint splatter lightly.
Budget tip: Use a toothbrush to flick paint gently.
Seal after drying. These are easy to batch-produce.
25. Cottagecore Wildflower Charm Set
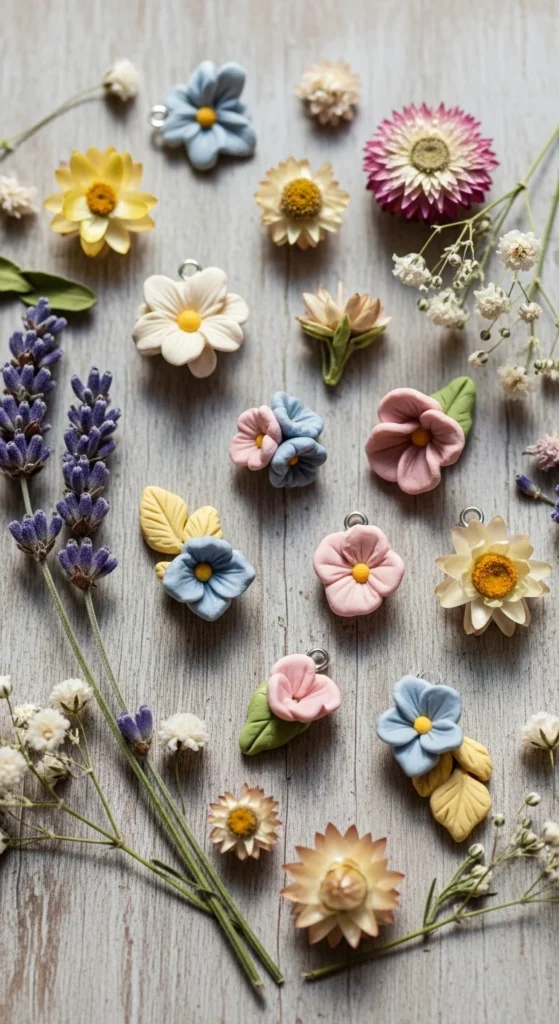
Wildflower charms feel sweet and handmade. Shape tiny petals and layer them into simple flowers. Add leaf charms too.
Bake small pieces carefully. Assemble as dangles or necklace charms.
Budget tip: Make a charm set and mix it across earrings, necklaces, and bracelets.
Use soft colors and a satin finish. This style matches boho and cottagecore trends.
Conclusion
Clay jewelry can look polished without expensive tools. Focus on clean shapes, even thickness, and strong hardware. Try marbled or ombre styles for a stone-like finish. Add texture using lace, leaves, or stamps for detail that photographs well. Make small matching sets to look like a boutique collection. Choose one idea from this list, gather basic supplies, and start creating pieces you’ll actually want to wear.


