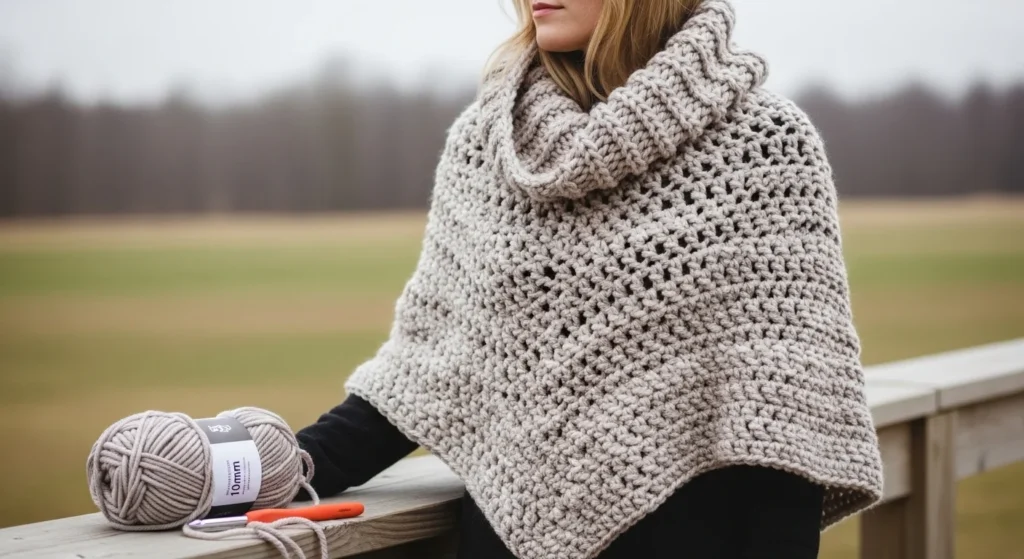
There’s something effortlessly cozy about a crochet poncho. It slips on in seconds, layers beautifully over sweaters or long sleeves, and feels like wearing a soft blanket — but stylish.
And here’s the best part: many beginner ponchos are made from simple rectangles or one-piece tubes. No complicated shaping. No stressful fitting. Just cozy stitches and smart construction.
Let’s walk through how to crochet a poncho step by step.
🧶 Step 1: Choose Your Yarn for Maximum Cozy
Ponchos shine when they have drape and warmth.
Beginner-Friendly Yarn Options:
- Bulky (#5) or Super Bulky (#6) – fast and ultra cozy
- Chenille yarn – plush and soft
- Worsted held double – lighter alternative to bulky
Hook guide:
- Bulky → 8–10mm hook
- Worsted held double → 6–8mm hook
For an adult small–XL poncho, you’ll typically need:
- 800–1200 yards bulky yarn
Chunky yarn + large hook = weekend project.
📏 Step 2: Pick Your Construction Method
You have two easy beginner options.
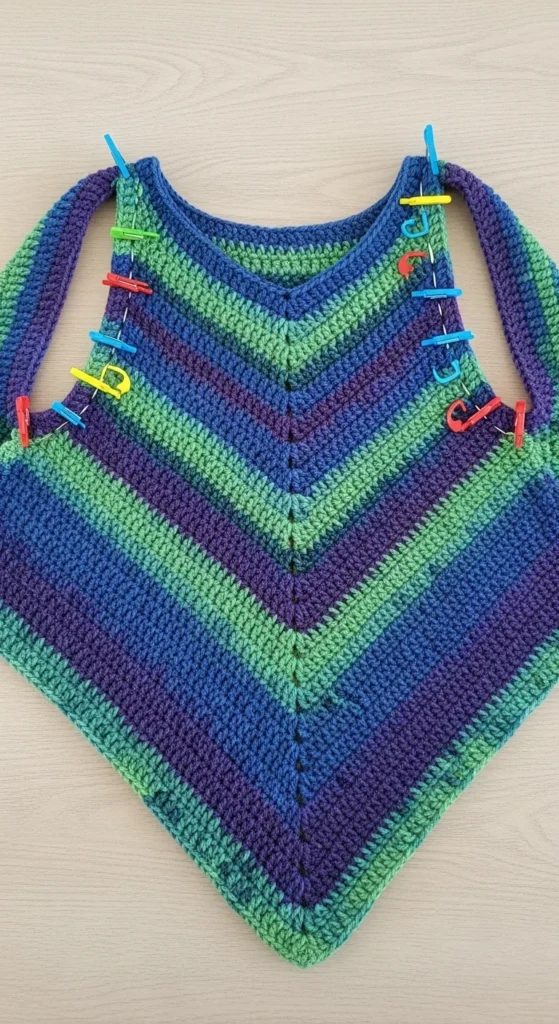
Option 1: Rectangle Panels (No Shaping)
Crochet:
- 2 large rectangles
- Or 4 panels (front, back, 2 sides)
Then seam them into poncho shape.
Option 2: One-Piece Tube (No Seaming)
- Chain to neck circumference
- Join into a round
- Work downward in joined rounds
This creates a seamless poncho — very beginner-friendly.
Neck circumference guideline:
- 20–24 inches for adults
Choose what feels more comfortable for you.
🧵 Step 3: Crochet the Body (Easy Repeat Rows)
For texture and simplicity, try:
Granny Stitch Poncho
- 3 double crochet clusters
- Chain spaces between clusters
- Repeat around
This creates a lacy but warm texture.
Or keep it solid with:
- Double crochet rows
- Half double crochet
- Herringbone HDC for knit-like look
Stick to a one-row repeat so you can relax while crocheting.
Continue repeating rows until your poncho reaches desired length.
📐 Step 4: Customize Length Easily
Ponchos are forgiving — just add rows until it feels right.
Short style:
- Hip length
Long cozy style:
- Mid-thigh
To measure:
- Try it on as you go
- Or measure from shoulder to desired hem
This “grow-your-own” method makes sizing easy.
👕 Step 5: Create Arm Openings (If Needed)
If using panels:
- Leave side seams partially open
- Measure arm width before seaming
If working in rounds:
- Chain a small gap for arms
- Mark armhole spaces with stitch markers
To prevent gaping:
- Keep chain counts consistent
- Reinforce edges with single crochet border
🧶 Step 6: Add a Cowl or Fold-Over Collar
A collar adds structure and warmth.
Easy Cowl Neck
- Attach yarn at neckline
- Crochet rows upward
- Fold over for cozy look
You can use:
- Double crochet
- Ribbed front/back post stitches
- Back loop only ribbing
Work 3–6 inches depending on desired height.
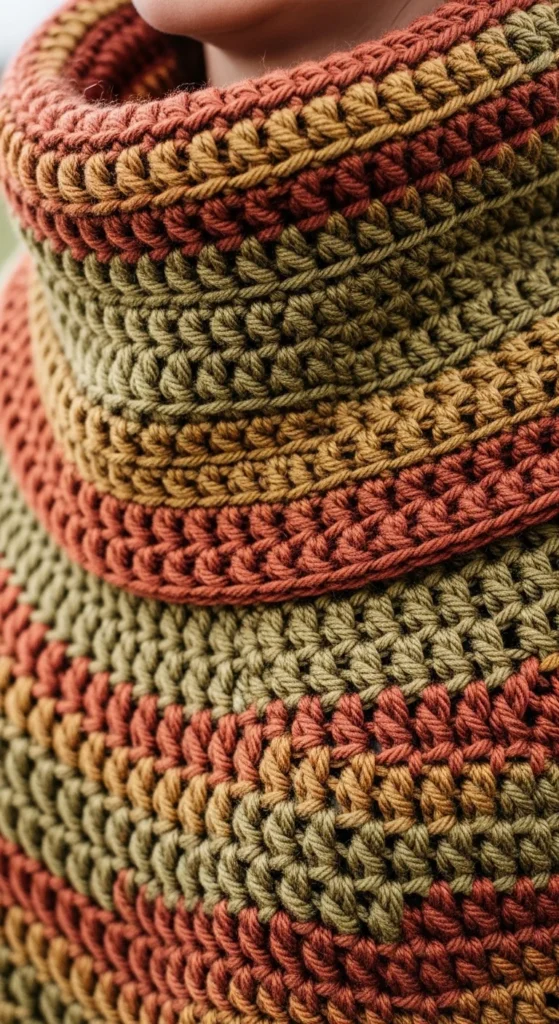
This small addition transforms a basic poncho into a statement piece.
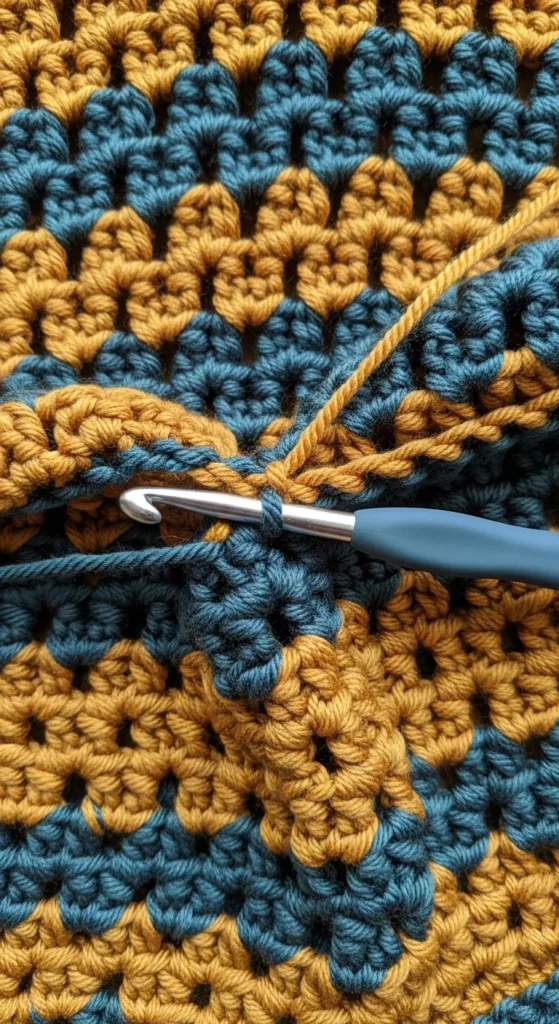
🎨 Step 7: Add Color Blocking or Texture
Modern ponchos often feature:
- Two-tone panel color blocking
- Contrast collar
- Alternating stripe rows
- Textured front post ribbing
Color blocking works especially well with rectangle panels — simply switch yarn midway.
Keep transitions clean by:
- Finishing last stitch with new color
- Weaving ends before starting collar
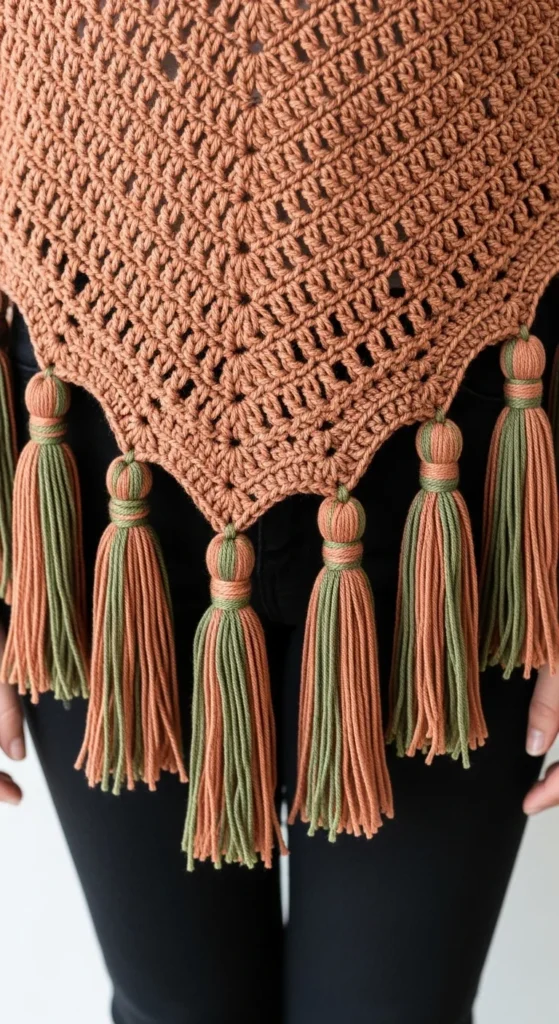
✨ Step 8: Finish with Borders or Fringe
Edge details elevate your poncho.
Options:
- Single crochet border
- Tassels on corners
- Fringe along hem
- Picot edging
Fringe adds boho movement.
Simple borders keep it modern.
💧 Step 9: Block for Perfect Drape
Blocking improves:
- Stitch definition
- Fabric drape
- Overall shape
Lightly steam (don’t press directly on yarn) and lay flat to cool.
Chunky yarn especially benefits from gentle blocking.
🚫 Common Beginner Mistakes
Neck too wide?
- Reduce starting chain
- Add collar rows
Armholes dropping too low?
- Seam higher
- Adjust chain gap size
Fabric too stiff?
- Go up a hook size
Fuzzy yarn splitting?
- Use smoother hook
- Slow down tension
🧶 Quick Construction Recap
- Choose bulky or worsted yarn
- Pick rectangle or seamless method
- Crochet simple repeat rows
- Adjust length
- Add arm openings
- Crochet collar
- Finish with border or fringe
- Block lightly
Simple. Cozy. Stylish.
💛 Final Thoughts
Crocheting a poncho for cozy layers doesn’t require advanced shaping or complex math. With:
- Simple rectangle panels or seamless rounds
- Easy repeat stitches
- Chunky yarn for warmth
- A finished collar and border
You can create a wearable piece that feels both handmade and fashionable.
🧶 Save this guide, grab your softest yarn, and start crocheting your cozy poncho today!


