If you’ve ever wanted to crochet a beanie that looks polished, fits well, and doesn’t involve confusing seams or constant counting — you’re in the right place. This step-by-step guide walks you through a simple top-down beanie using beginner-friendly stitches, chunky yarn options, and easy shaping techniques.
It’s cozy, customizable, and totally doable — even if this is one of your first wearables.

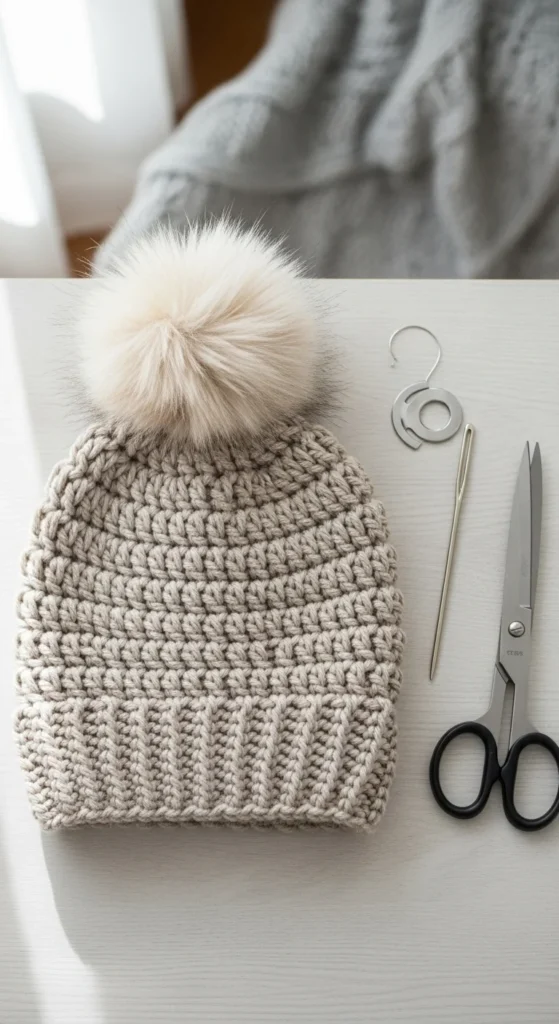
🧶 What You’ll Need to Get Started
Before we crochet, let’s keep your setup beginner-easy.
Supplies:
- Yarn: Bulky (#5–6) for speed, or worsted held double
- Crochet hook: 6mm–10mm (larger hook = faster project)
- Yarn needle (for weaving ends)
- Stitch marker (optional but helpful)
- Scissors
- Optional: faux fur or yarn pom pom
Why bulky yarn?
- Beanies finish in 30–60 minutes
- Stitches are easy to see
- Perfect for gifts and quick wins
📏 Step 1: Measure Your Head (Don’t Skip This!)
Fit problems usually come from skipping measurements.
- Measure head circumference
- Beanie should be 2–3 inches smaller than the head (this is called negative ease)
Example:
- Head: 22”
- Beanie target: ~19–20”
This ensures stretch without looseness.
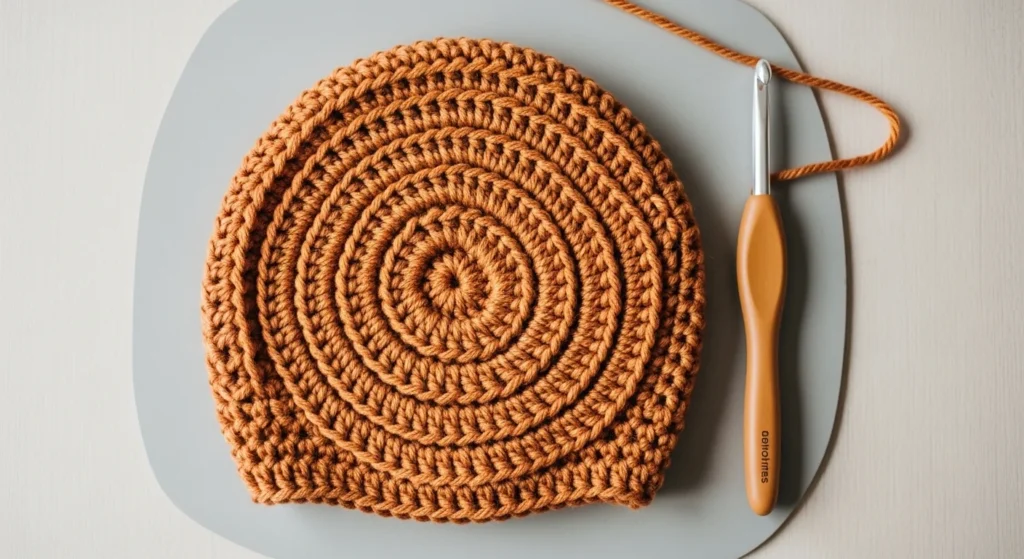
🪄 Step 2: Start with a Magic Ring (Top-Down Method)
We’ll begin at the crown and work downward in continuous rounds — no joining, no seams.
Magic Ring + Double Crochet Increases
- Make a magic ring
- Crochet 10–12 double crochet (DC) into the ring
- Pull tight to close the center
Each new round increases evenly to form a flat circle.
Goal size:
- Adult medium crown ≈ 3.5–4 inches in diameter
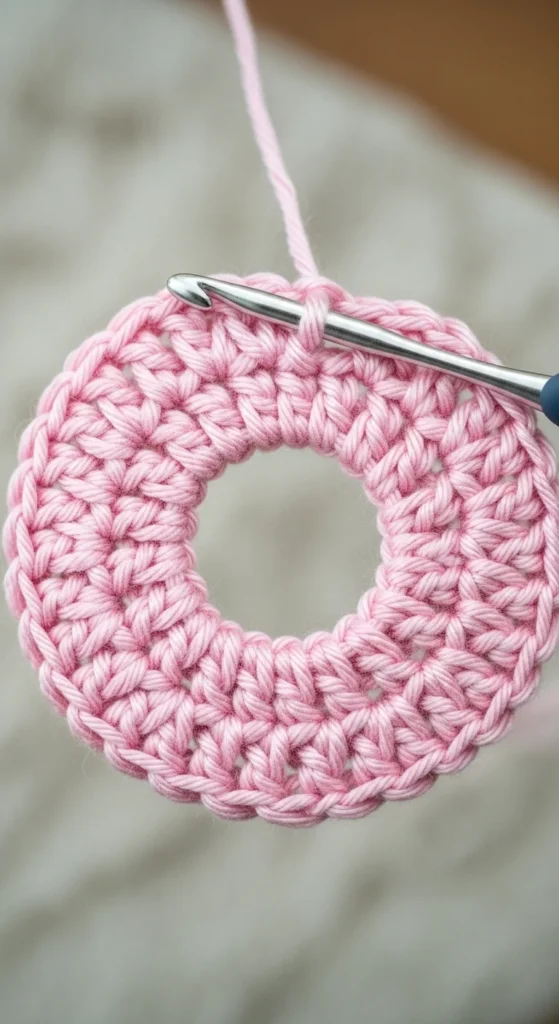
Tip:
If your circle ripples → too many stitches
If it cups → too few stitches
🔄 Step 3: Build the Beanie Body in a Seamless Spiral
Once your crown is wide enough, stop increasing.
Now switch to half double crochet (HDC) and continue crocheting in a spiral (no joining rounds).
Why HDC?
- Fast
- Stretchy
- Beginner-friendly
- Clean texture
Keep going until the hat reaches about 7–7.5 inches tall for a fitted beanie.
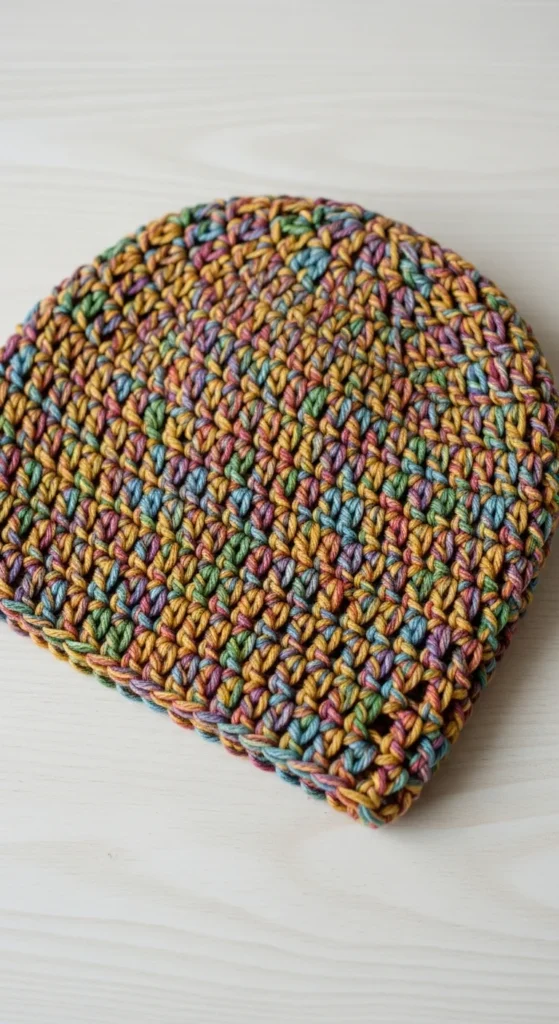
Want it slouchy?
Add 1–2 extra inches before the brim.
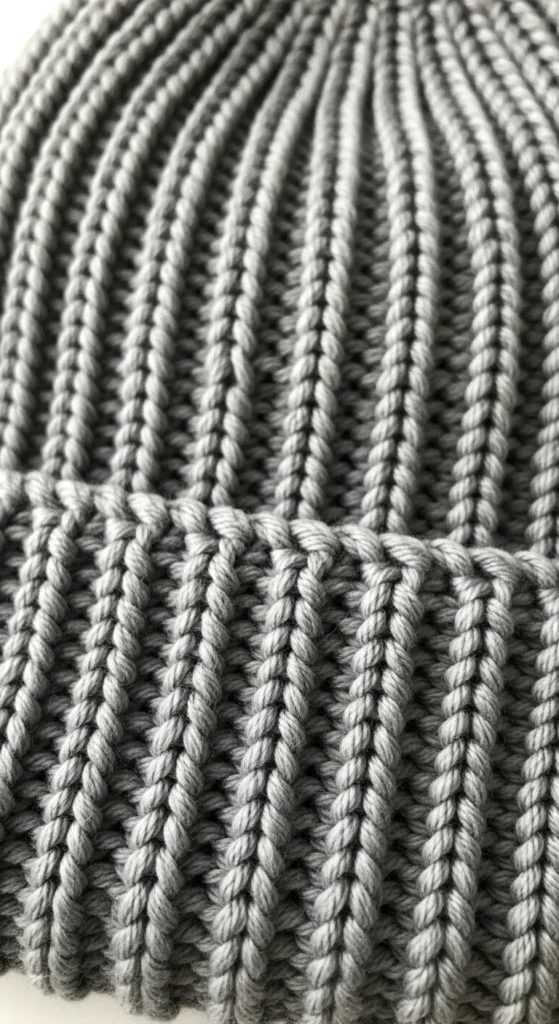
🧵 Step 4: Add a Stretchy Ribbed Brim
To keep the brim comfy and non-curling, we’ll use back loop only (BLO) stitches.
Simple Ribbed Brim Option
- Crochet 1–2 inches using HDC or DC in the back loop only
- This creates a knit-like ribbed texture
- Stretches nicely over the head
Alternative:
- Crochet a small rectangle brim, then sew it into a tube and attach it — great for foldable brims.
🎯 Step 5: Finish the Top Cleanly (No Gaps!)
If you’re shaping the top with decreases instead of a magic ring start, here’s how to close neatly:
- Use dc2tog decrease rounds evenly
- In the final round, chain 1, skip 1 stitch around
- Pull yarn through to cinch the top closed
This method avoids the dreaded hole at the crown.
Secure tightly and knot well.
🎀 Step 6: Weave Ends + Optional Pom Pom
Weave ends with a yarn needle:
- Run yarn through multiple stitch directions
- Tug gently to hide
- Trim excess
Optional upgrades:
- Faux fur pom for a modern look
- Yarn pom for a soft, classic finish
- Removable snap pom for easy washing
🚫 Common Beginner Mistakes (And Easy Fixes)
Beanie too big?
- Crown too wide → fewer increase rounds next time
Beanie too tight?
- Switch to a larger hook
- Add extra body rows
Brim curling?
- Add more BLO rows
- Use HDC instead of SC
Ends popping out?
- Weave through more stitches
- Change directions while weaving
✨ Customize Your Beanie
Once you’ve made one, try:
- Family sets (same pattern, different sizes)
- Ribbed brims vs. straight edges
- Texture ridges using front post stitches
- Slouchy or fitted styles
- Color-blocked designs
Same pattern — endless looks.
💛 Final Takeaway
Crocheting a simple beanie doesn’t have to be complicated.
With:
- A magic ring start
- Seamless spiral rounds
- Basic stitches (DC + HDC)
- A stretchy ribbed brim
You can create a clean, cozy beanie that looks great and fits well — even as a beginner.
🧶 Save this guide, grab your yarn, and crochet your first simple beanie today!


