Air dry clay projects are one of the easiest ways to create decor that looks store-bought without spending much. With simple shaping, proper drying, sanding, and sealing, you can turn basic clay into pieces that resemble handmade ceramics. Below are 26 numbered air dry clay ideas designed to look professionally made while staying beginner friendly and budget conscious.
1. Minimalist Marble Coasters
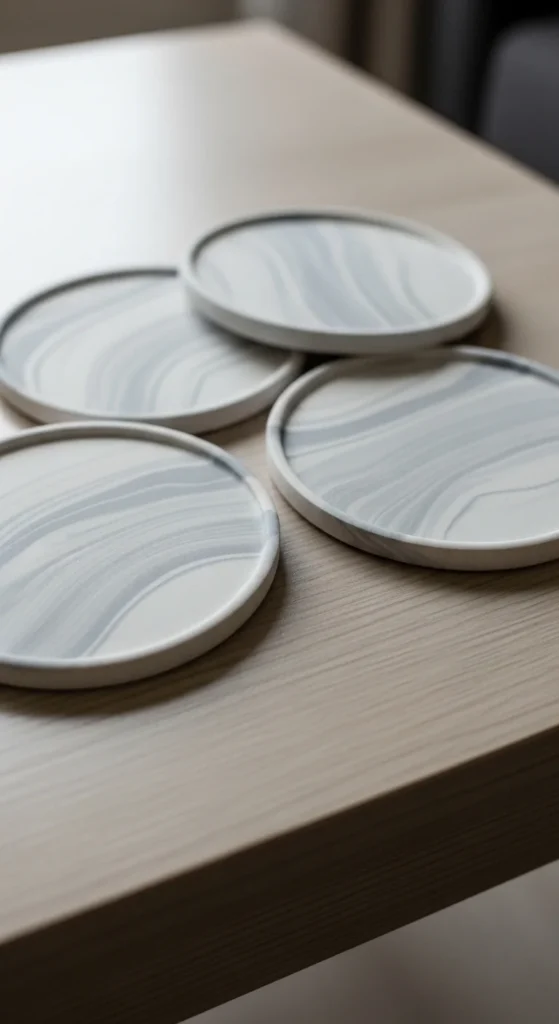
Roll white and grey clay together gently to keep visible swirls. Cut with a glass for clean edges. Dry flat for 24 hours. Sand lightly and seal with matte varnish. Thin coats prevent streaks.
2. Textured Lace Trinket Dishes
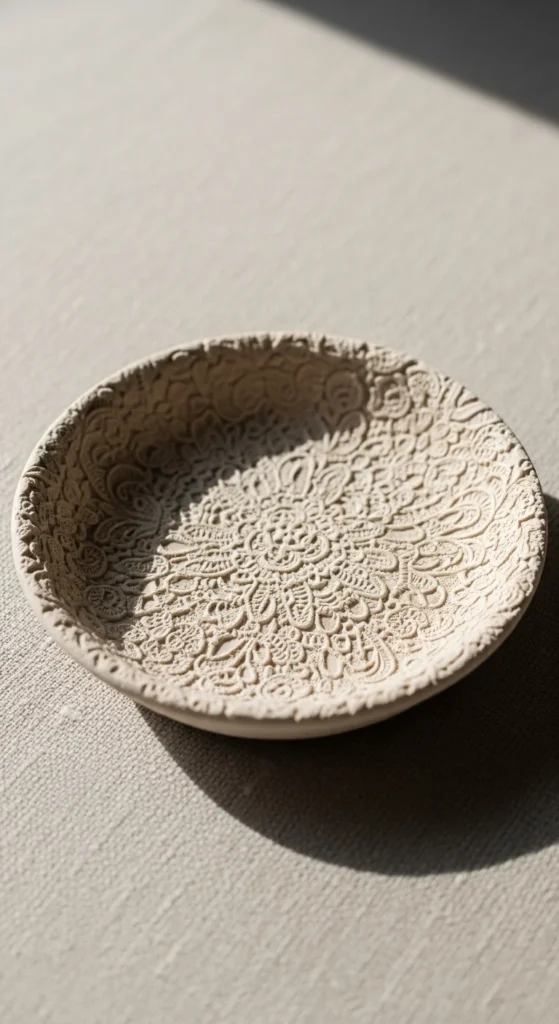
Press lace into rolled clay before shaping into a shallow bowl. Let dry over an inverted bowl for curve. Paint lightly with diluted acrylic for a ceramic feel.
3. Modern Clay Ring Holders

Roll a cone shape and smooth with damp fingers. Sand after drying. Seal with gloss varnish for a polished look.
4. Embossed Clay Wall Art
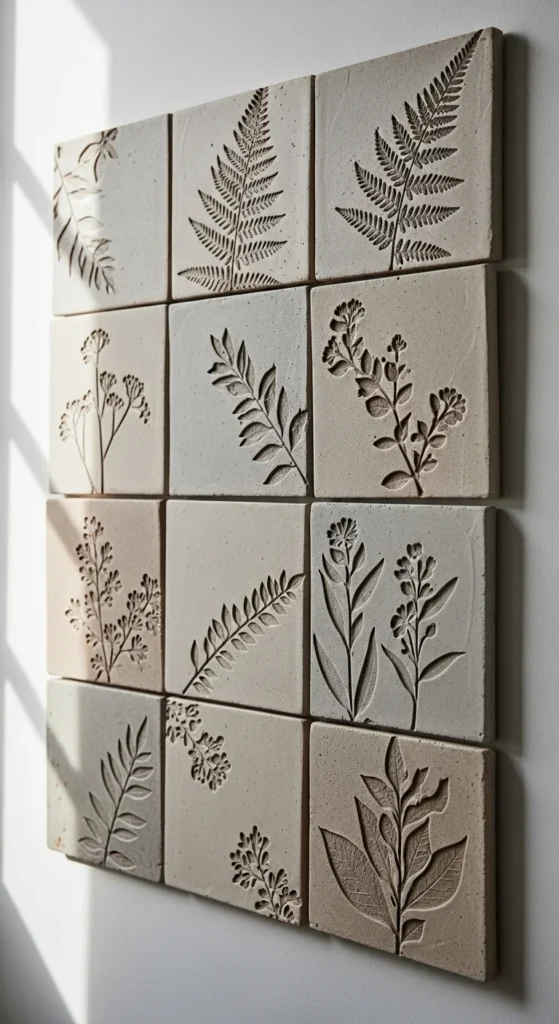
Use texture stamps or leaves for imprint. Poke hanging holes before drying. Paint subtle earth tones after curing.
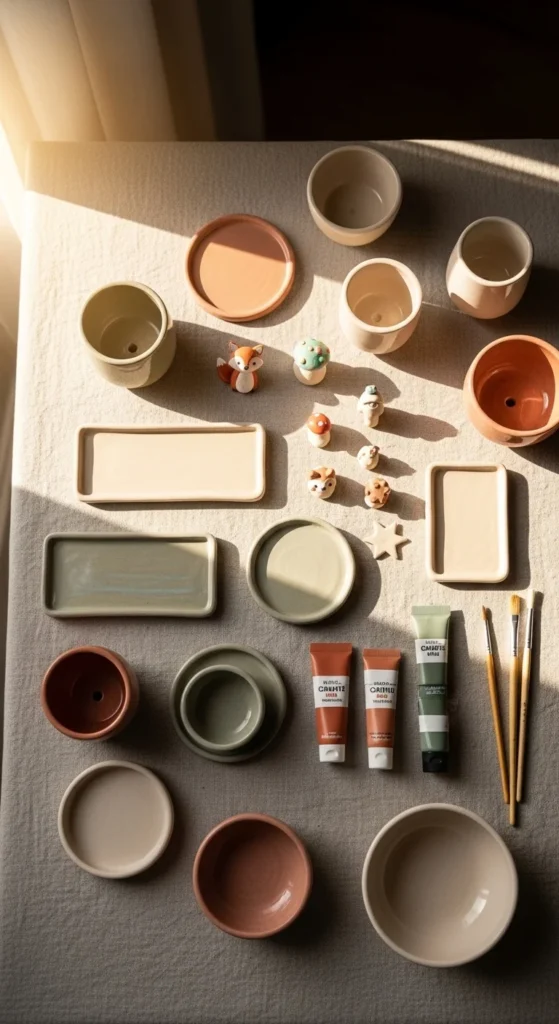
5. Succulent Planters
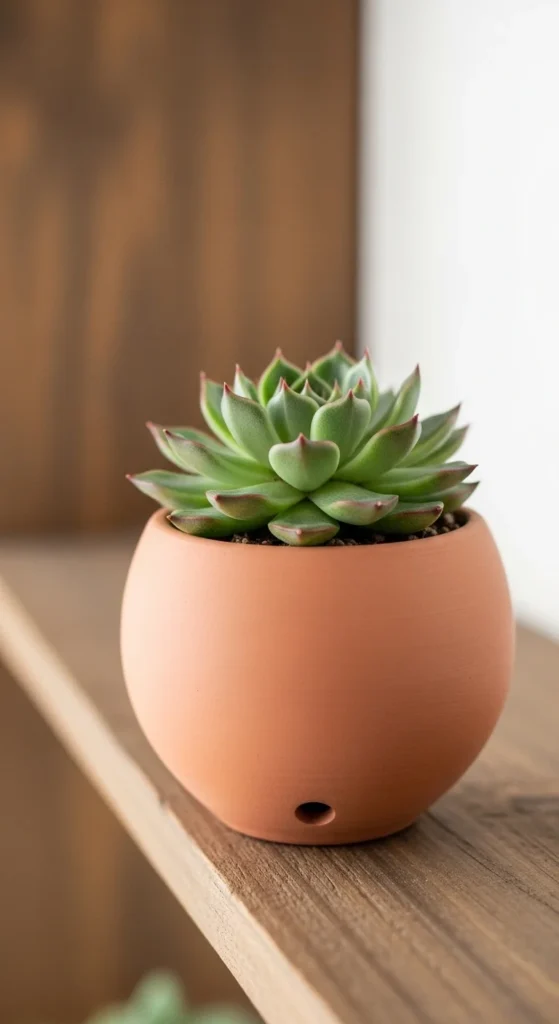
Shape a bowl and poke drainage holes. Let dry fully. Seal interior with waterproof varnish before planting.
6. Alphabet Desk Organizers

Cut thick letter shapes. Hollow slightly before drying. Sand edges and paint with acrylic.
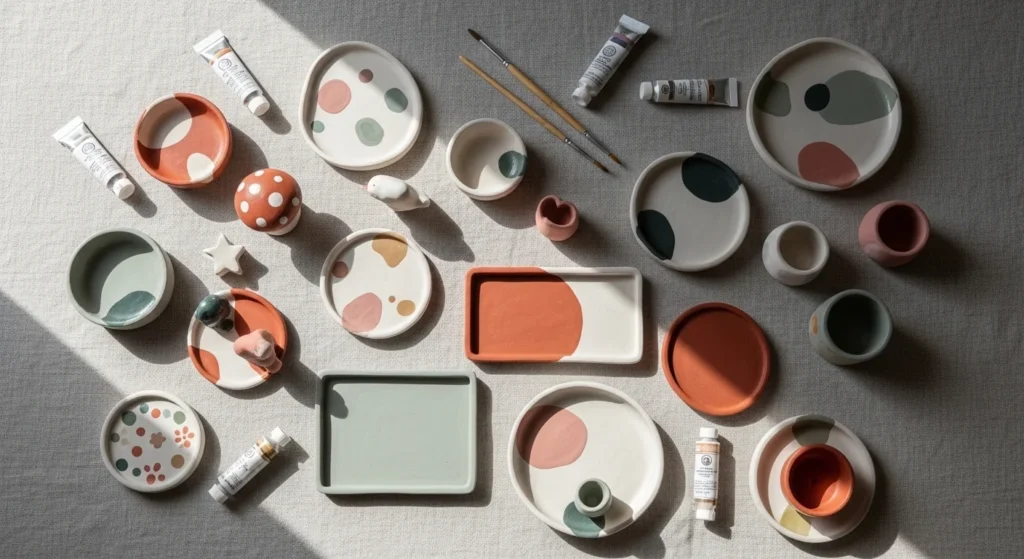
7. Painted Clay Bowls
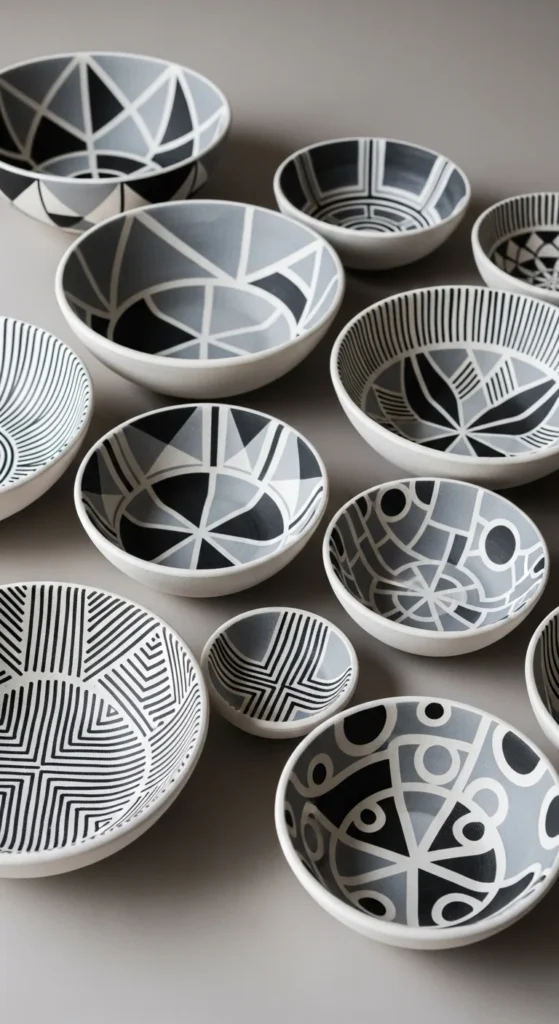
Roll slabs and shape over bowls. Dry slowly. Paint simple lines for clean style.
8. Animal Figurines
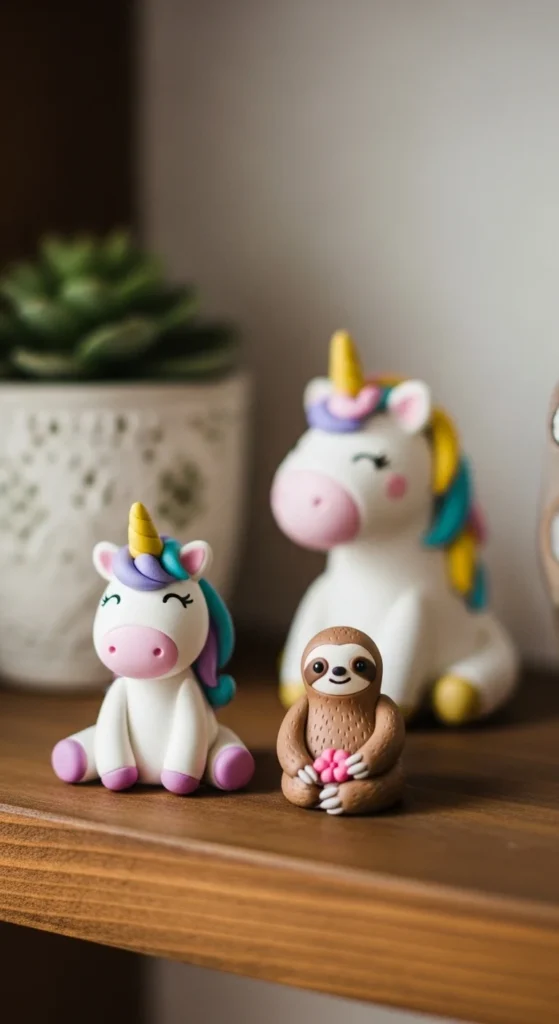
Sculpt simple rounded forms. Smooth with damp brush. Paint after 24-hour drying.
9. Clay Jewelry Earrings
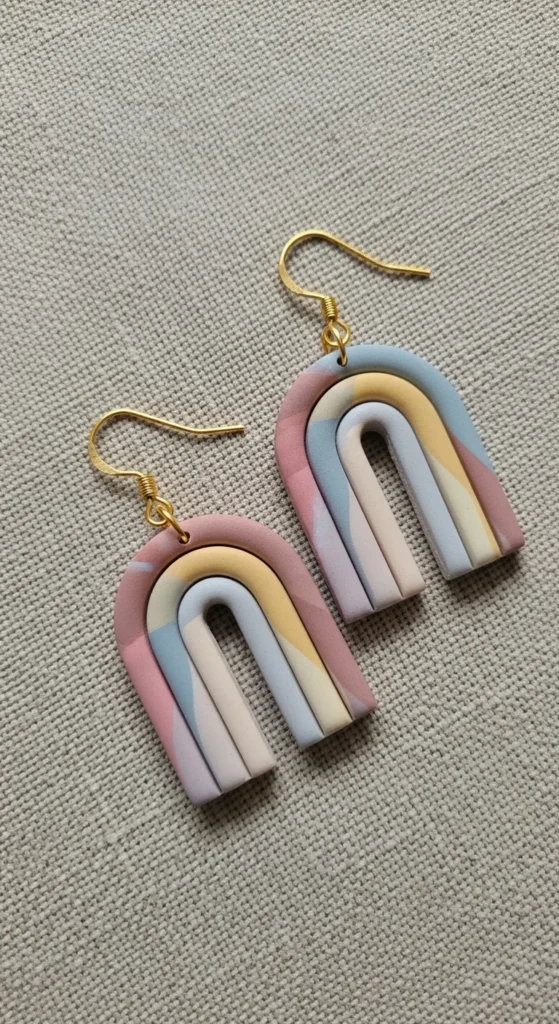
Cut shapes. Make holes before drying. Sand lightly. Seal and attach hooks.
10. Decorative Clay Trays
Roll slab evenly. Lift edges gently. Sand and varnish for smooth finish.
11. Clay Diffuser Stones
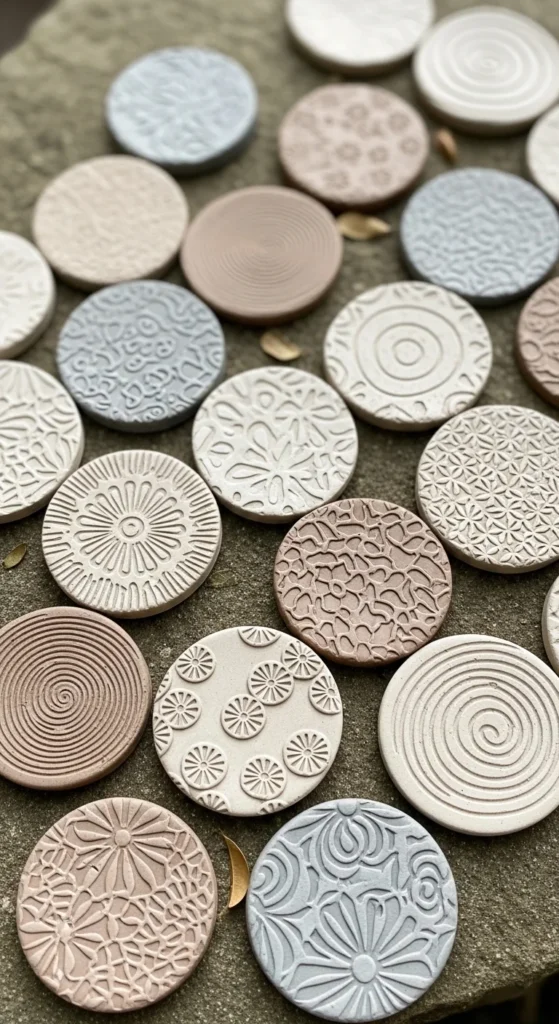
Stamp patterns before drying. Add a few drops of essential oil once sealed.
12. Rainbow Wall Ornaments
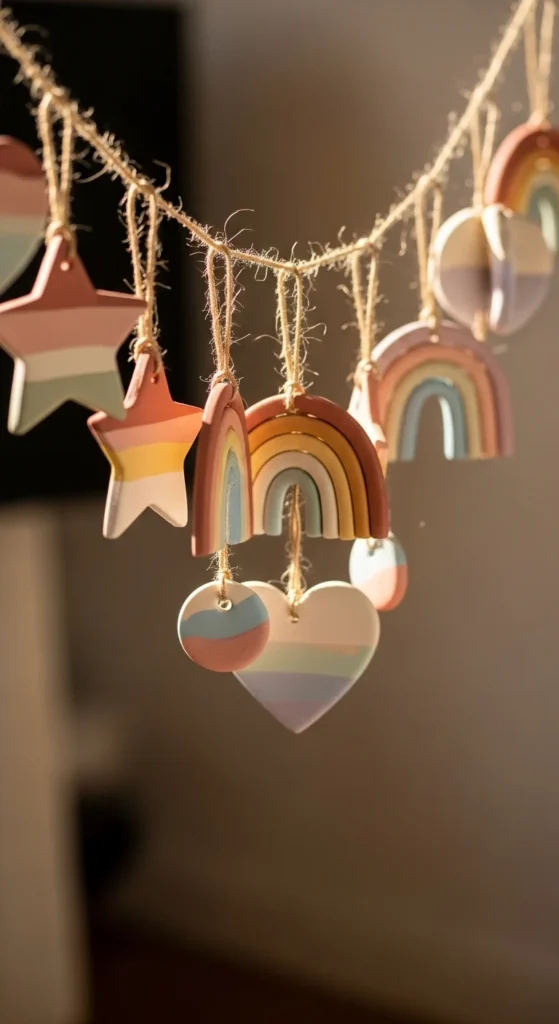
Layer curved strips. Smooth seams. Paint muted tones.
13. Clay Food Magnets

Sculpt simple shapes. Paint with acrylic. Glue magnet backs after sealing.
14. Thin Modern Vases
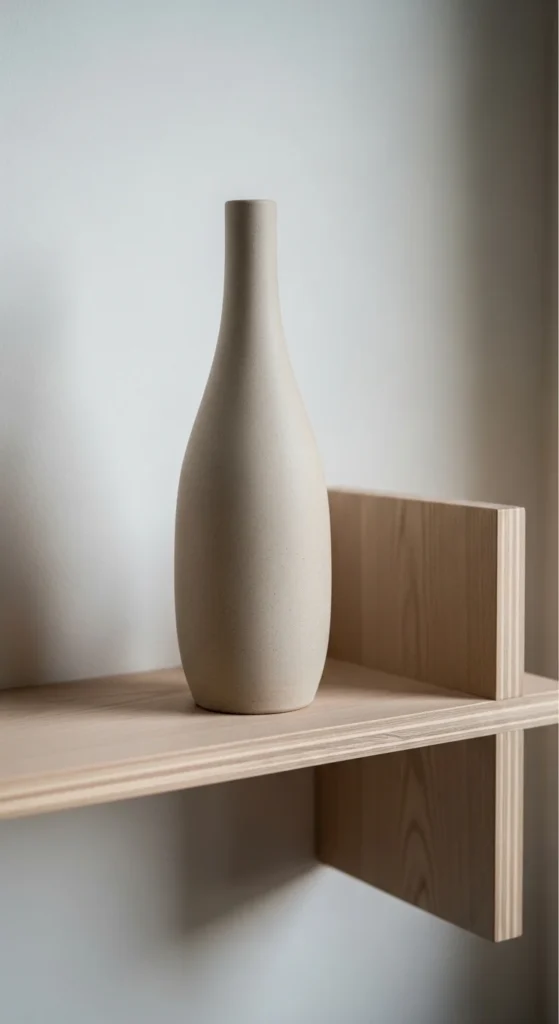
Build with coil method. Smooth seams. Seal interior lightly.
15. Koi Pond Mini Sculpture
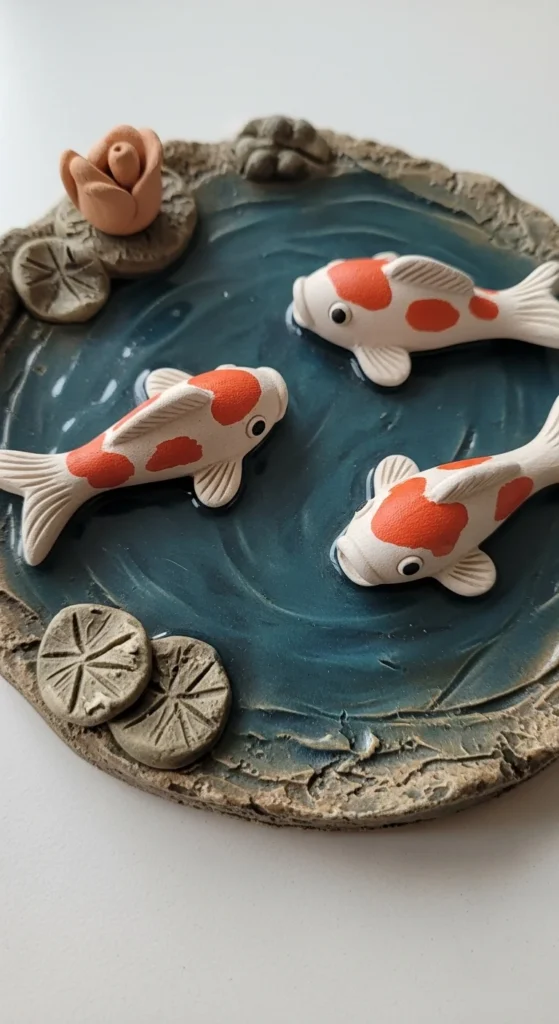
Shape base first. Add fish details after partial drying.
16. Clay Candle Holders

Measure candle first. Shape snug base. Seal for durability.
17. Mermaid Egg Surprise
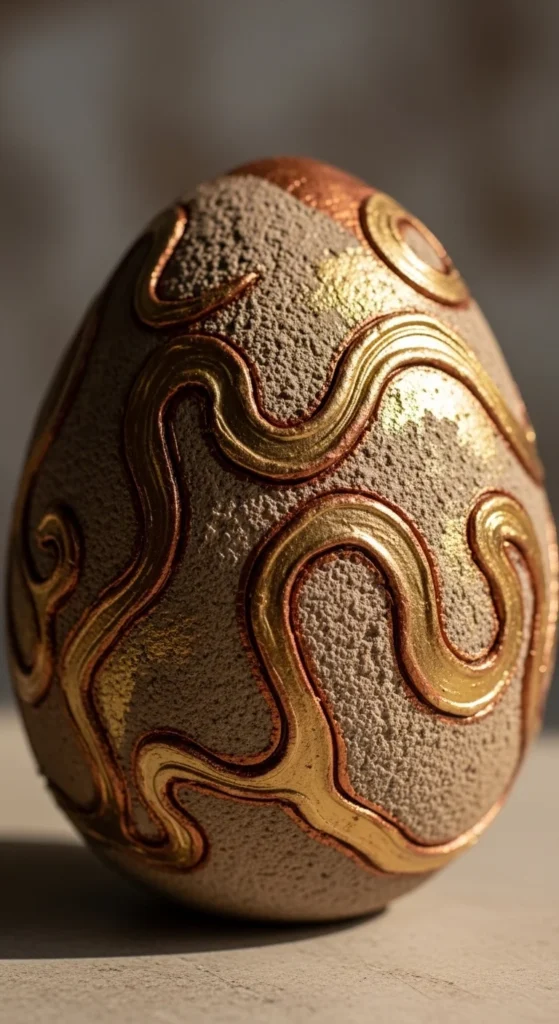
Roll textured ball. Press pattern. Paint with pearl acrylic.
18. Clay Key Trays
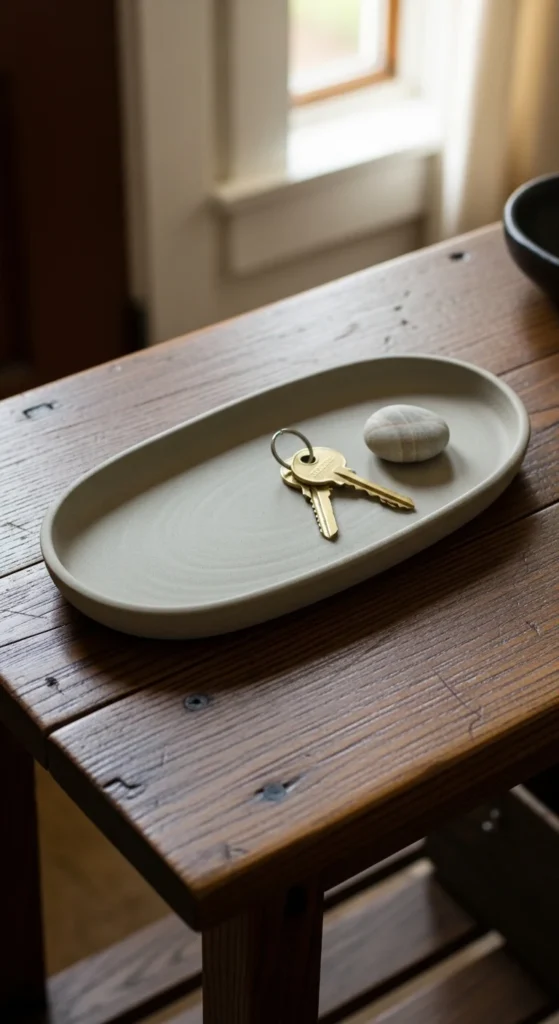
Roll slab. Curve edges. Sand for professional surface.
19. Botanical Leaf Imprints
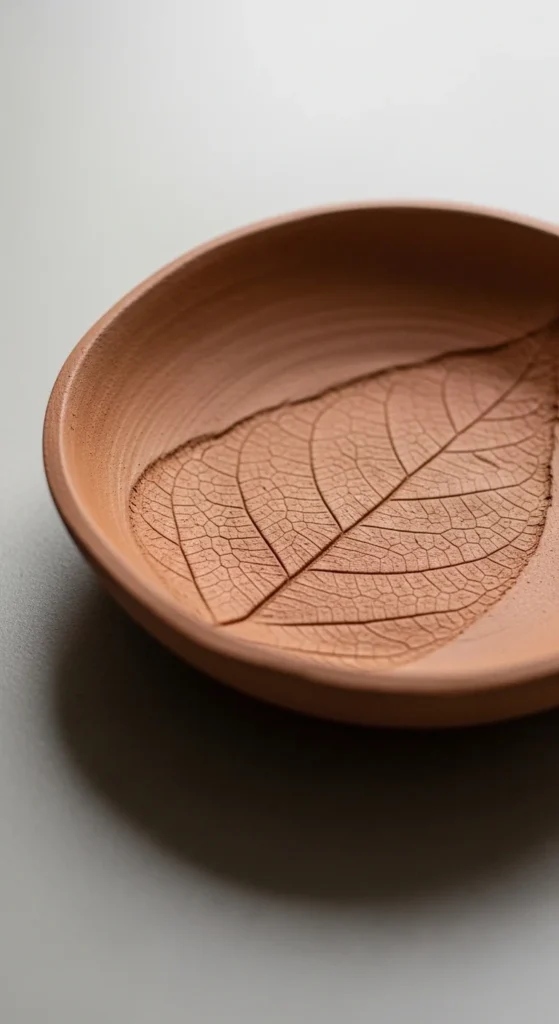
Press real leaves firmly. Peel carefully. Paint lightly.
20. Hanging Clay Ornaments

Cut shapes. Insert holes pre-dry. Seal after painting.
21. Clay Picture Frames
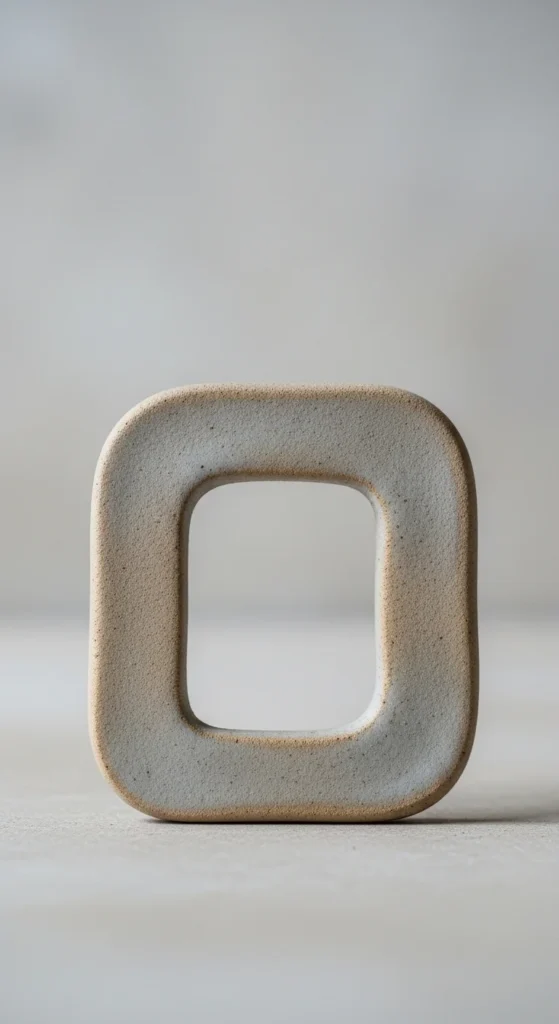
Shape outer frame. Insert cardboard backing later.
22. Sloth Plant Hanger
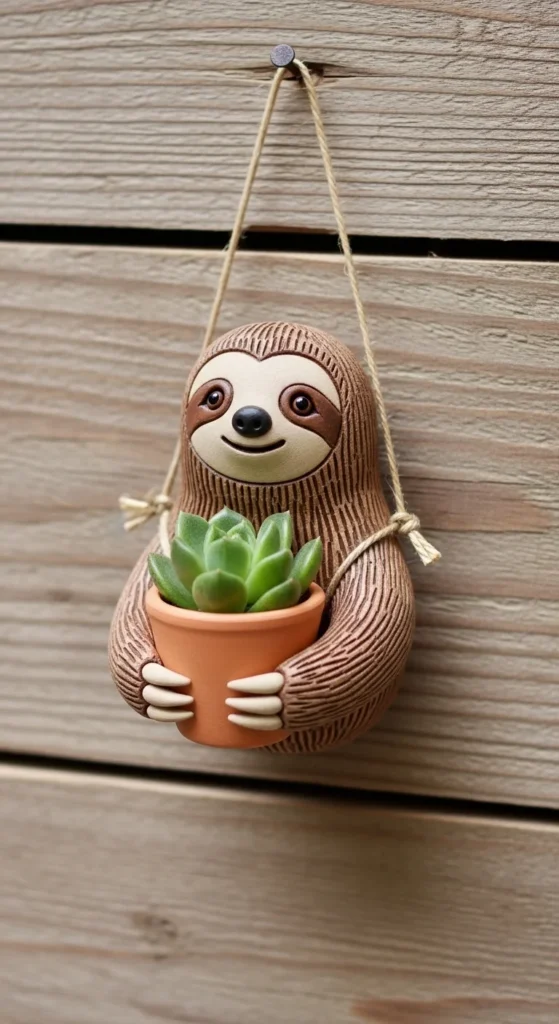
Sculpt body around pot form. Attach hook before drying.
23. Marble Effect Jewelry Dish
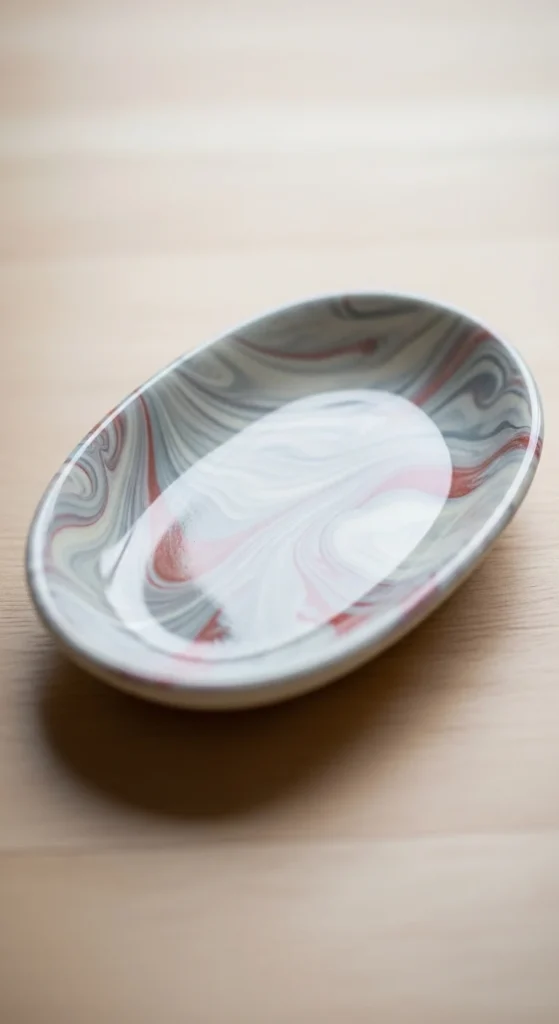
Mix colors lightly. Cut oval shape. Gloss varnish after sanding.
24. Clay Bookends
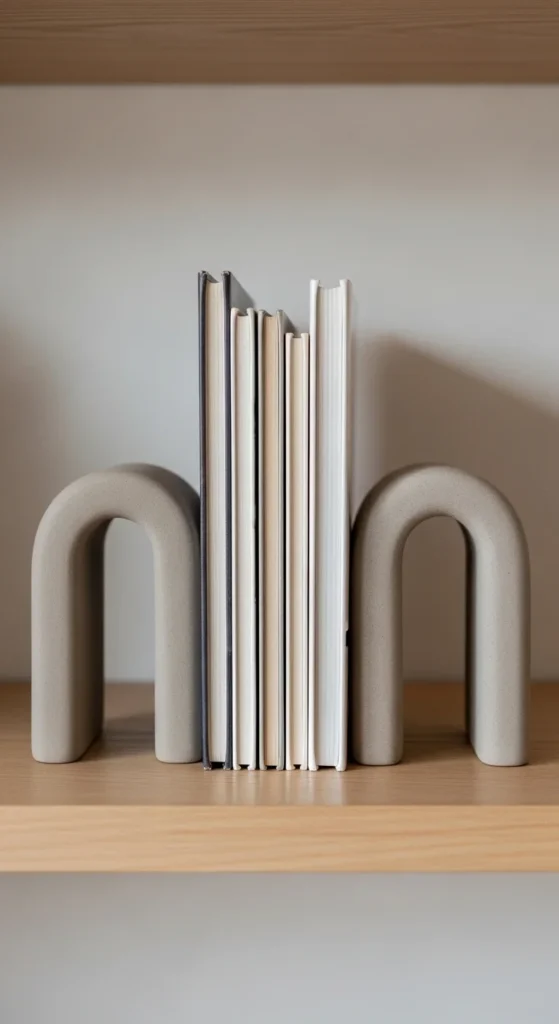
Create thick L-shape blocks. Dry fully before sanding.
25. Silicone Mold Trinkets
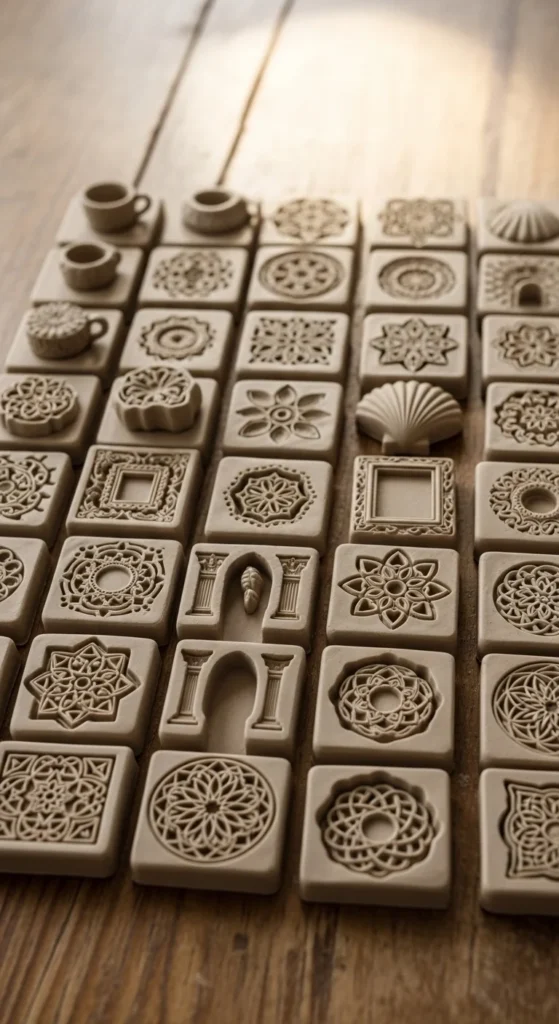
Press clay into molds. Remove carefully. Smooth seams before drying.
26. Illustrated Trinket Boxes
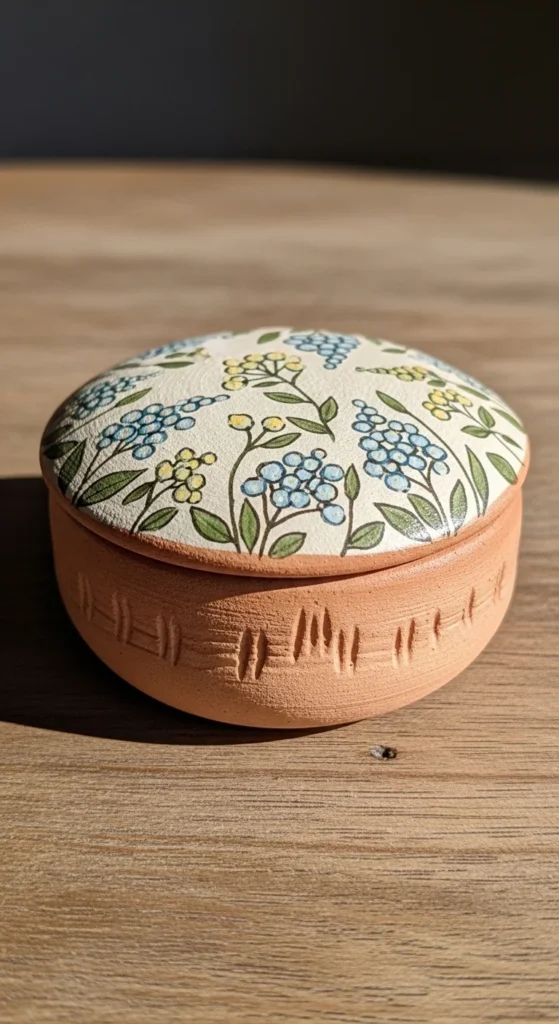
Create base and lid separately. Sand edges for tight fit. Paint simple patterns. Seal with varnish.
Conclusion
Air dry clay can look like handmade pottery when you focus on even thickness, smooth edges, proper drying, and sealing. Most projects only require simple tools, patience, and thin coats of paint and varnish. Start small, practice sanding, and experiment with texture tools. With consistency, your clay pieces can look polished, gift-worthy, and ready to display or sell.


