Ever wished you could turn a simple ball of yarn into something cozy and handmade? Crochet looks complicated at first glance—but once you learn a few basic moves, it becomes relaxing, rhythmic, and surprisingly addictive.

This beginner-friendly guide walks you through crochet step by step, from your very first slip knot to finishing a simple practice square. Grab a hook, some yarn, and let’s get started.
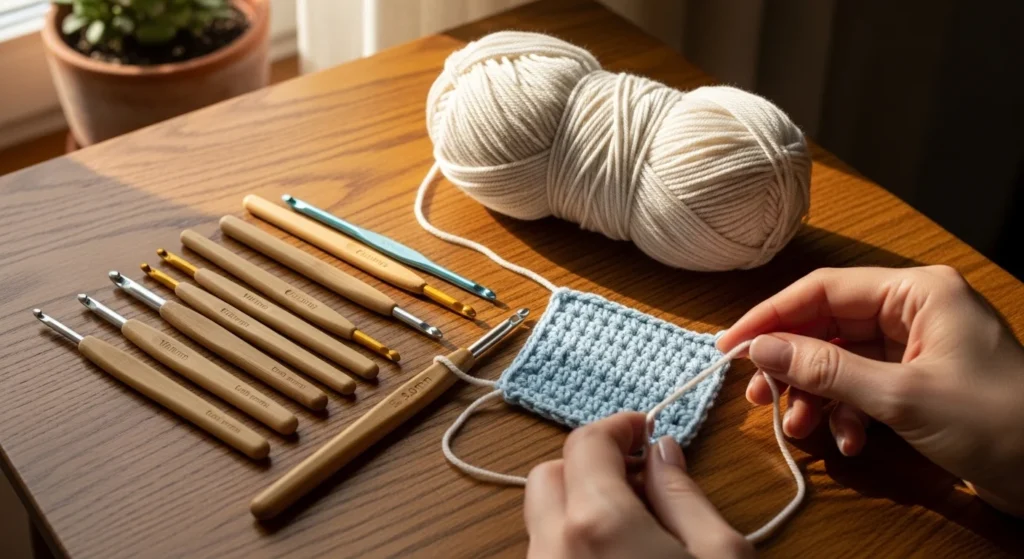
Step 1: Gather the Right Beginner Supplies
Starting with the right tools makes everything easier.
For beginners, use:
- Size H / 5mm crochet hook
- Worsted weight yarn
- Scissors
- Yarn needle (for weaving in ends)
This hook and yarn combo is forgiving. The stitches are big enough to see clearly but not too bulky.
If you struggle with tight tension, try a slightly larger hook. If your stitches look loose, go slightly smaller.
Keep your first project simple. A 6×6-inch practice square is perfect for building confidence.
Step 2: Make a Slip Knot (Your First Stitch)
Every crochet project starts with a slip knot.
Here’s how:
- Make a loop with your yarn.
- Pull the working yarn through the loop.
- Place it on your hook and gently tighten.
It should slide easily on the hook—not too tight.
If your chain stitches feel stiff later, your slip knot may be too tight. Loosen it slightly before continuing.
This adjustable loop is your foundation. Master this, and you’re officially crocheting.
Step 3: Learn How to Hold the Hook and Yarn
There’s no single “right” way to hold your hook. Most beginners use one of two grips:
- Pencil grip (like writing)
- Knife grip (like cutting food)
Try both and see which feels natural.
For yarn tension:
- Wrap yarn around your pinky once.
- Guide it over your ring and middle fingers.
- Pinch your work with thumb and index finger.
This helps control the yarn smoothly without pulling too tight.

If your stitches look uneven, tension is usually the reason. Slow down and relax your hands.
Step 4: Chain Stitch (Your Foundation Row)
The chain stitch creates your starting row.
To make a chain:
- Yarn over (wrap yarn over hook from back to front).
- Pull through the loop already on your hook.
Repeat 15–20 times for practice.
Keep your chains loose enough that the hook moves freely.
Look closely—each chain forms a small “V” shape on top. These V-stitch tops help you count.
If you lose count, don’t panic. Just recount carefully from the beginning.
Step 5: Single Crochet (Your First Real Stitch)
Now for your first actual stitch: single crochet (sc).
Here’s the step-by-step motion:
- Insert hook into the second chain from the hook.
- Yarn over.
- Pull up a loop (two loops on hook).
- Yarn over again.
- Pull through both loops.
That’s it. You made your first single crochet.
Continue across the row.

Single crochet creates a tight, sturdy fabric. It’s ideal for scarves, dishcloths, and simple projects.
Step 6: Turning Chain and Starting Row Two
When you reach the end of your row:
- Chain 1 (this is your turning chain for single crochet).
- Turn your work around.
Insert your hook into the first stitch of the new row.
Always look for the top “V” shapes when inserting your hook. That keeps edges straight.
If your sides look slanted, you may be skipping the first or last stitch. Count carefully.
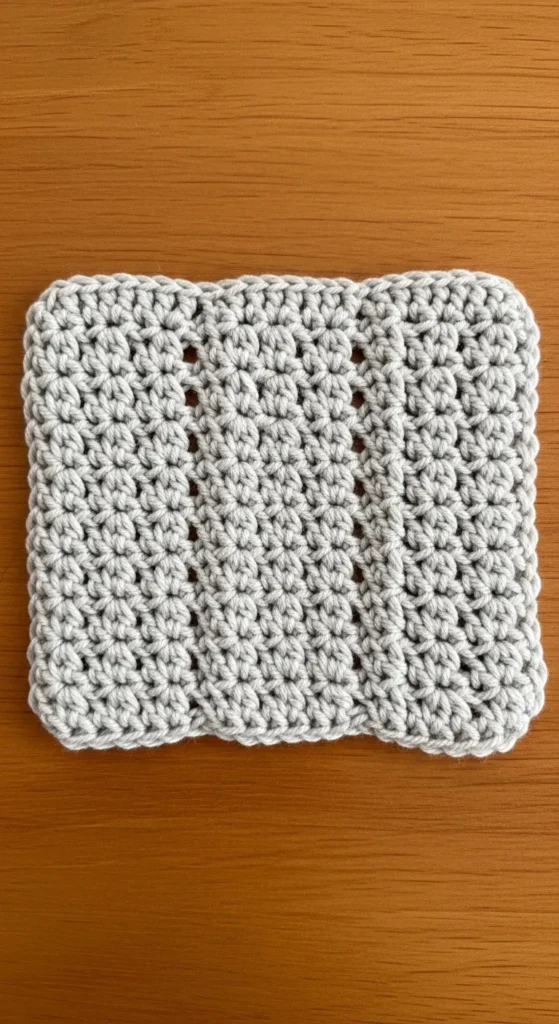
Step 7: Practice Tension with a Small Square
Instead of jumping into a scarf immediately, make a small practice swatch.
Aim for:
- 6 inches wide
- 6 inches tall
This helps you:
- Improve tension
- Learn counting
- Fix mistakes without pressure
If you make an error, simply “frog” it—pull the yarn out gently and redo the stitches. It’s completely normal.
Crochet is forgiving. Mistakes are part of learning.
Step 8: Try Half Double and Double Crochet
Once single crochet feels comfortable, level up.
Half Double Crochet (hdc)
- Yarn over first.
- Insert hook.
- Yarn over, pull up loop (three loops on hook).
- Yarn over, pull through all three loops.
Double Crochet (dc)
- Yarn over.
- Insert hook.
- Yarn over, pull up loop.
- Yarn over, pull through two loops.
- Yarn over, pull through last two loops.
Notice how stitches get taller as you move up. This affects the turning chain:
- 1 chain = single crochet
- 2 chains = half double
- 3 chains = double
Step 9: Finish Like a Pro
When you’re done:
- Cut yarn, leaving a 6-inch tail.
- Pull tail through last loop and tighten.
- Thread tail onto yarn needle.
- Weave into stitches to hide it.
This keeps your project secure and clean-looking.
Take a moment to admire your work. That small square represents a big new skill.
Step 10: Your First Simple Project Idea
Once comfortable, try:
- A beginner scarf
- A dishcloth
- A simple granny square
Use chunky yarn if you want faster progress. Larger stitches make it easier to see your work.
And remember—left-handed crocheters can mirror all these steps. Many tutorials offer reversed demonstrations.
Final Thoughts
Crochet isn’t about perfection. It’s about rhythm, patience, and practice.
Start with a slip knot.
Chain 20.
Single crochet across.
Repeat.
Before long, your hands will remember the motion.
Save this guide, grab your hook, and make your first square today.


