A mantel is often the natural focal point of a room. Whether it sits above a fireplace or acts as a decorative ledge, it’s one of the first places people notice when they walk in. The best part? You don’t need expensive decor to make it look styled and intentional. With a few DIY decor pieces and some simple design rules, you can decorate a mantel that feels warm, balanced, and personal.
This guide will show you how to decorate a mantel using DIY decor in a way that feels curated—not cluttered—and easy to refresh throughout the year.
Start With a Clean, Empty Mantel
Before adding anything new, clear the mantel completely. Starting fresh helps you avoid overdecorating and makes it easier to plan your layout.
Once it’s empty:
- Wipe the surface so dust doesn’t dull your decor
- Note the mantel’s width, depth, and height
- Decide if you want a centered focal point or an asymmetrical look
A clean slate gives you clarity and helps your DIY pieces stand out.
Choose a Simple Color Palette
One of the biggest styling mistakes is using too many colors. DIY decor looks more intentional when it follows a clear color story.
Try this approach:
- Pick 2–3 main colors
- Use neutrals as a base
- Add contrast with darker or textured elements
This keeps the mantel cohesive and visually calm, even when using handmade items.
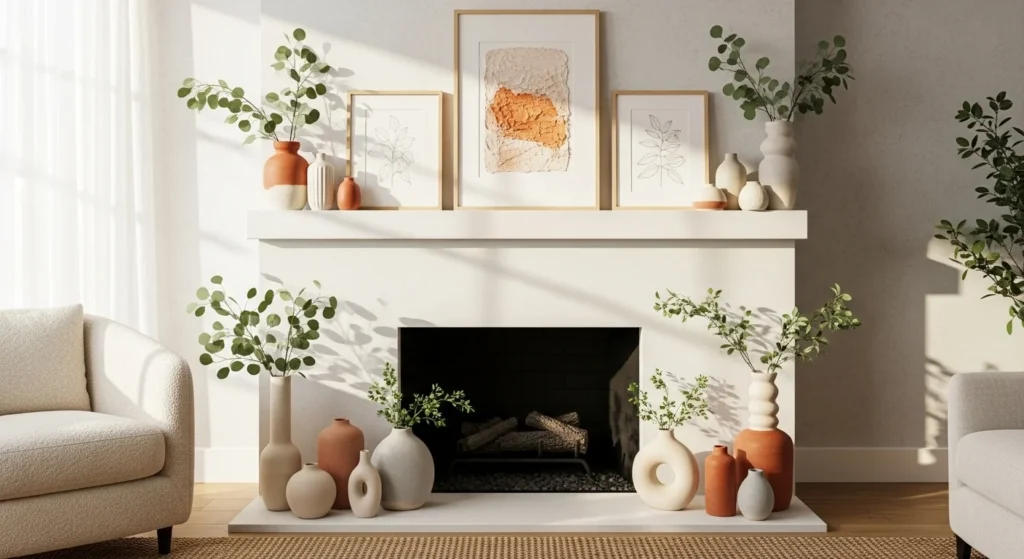
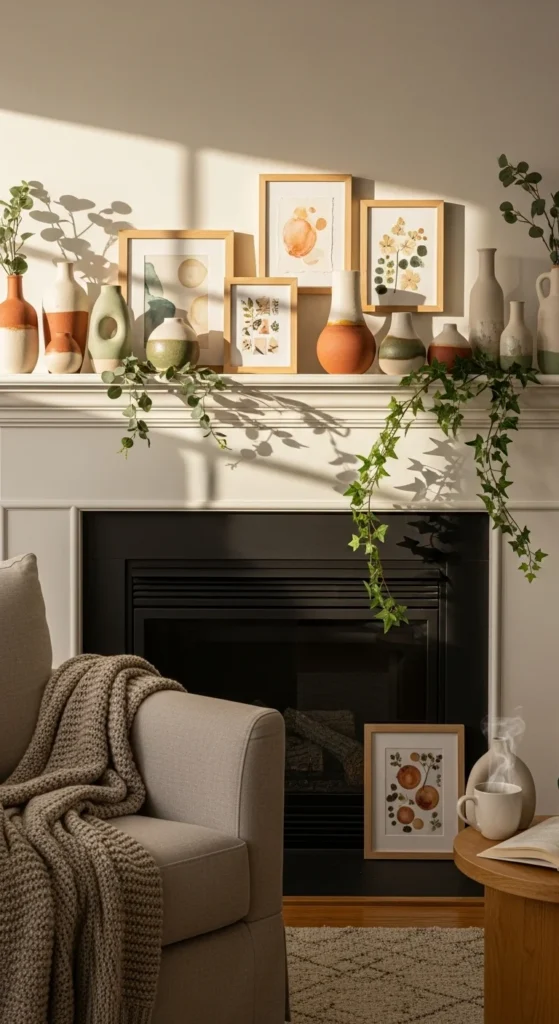
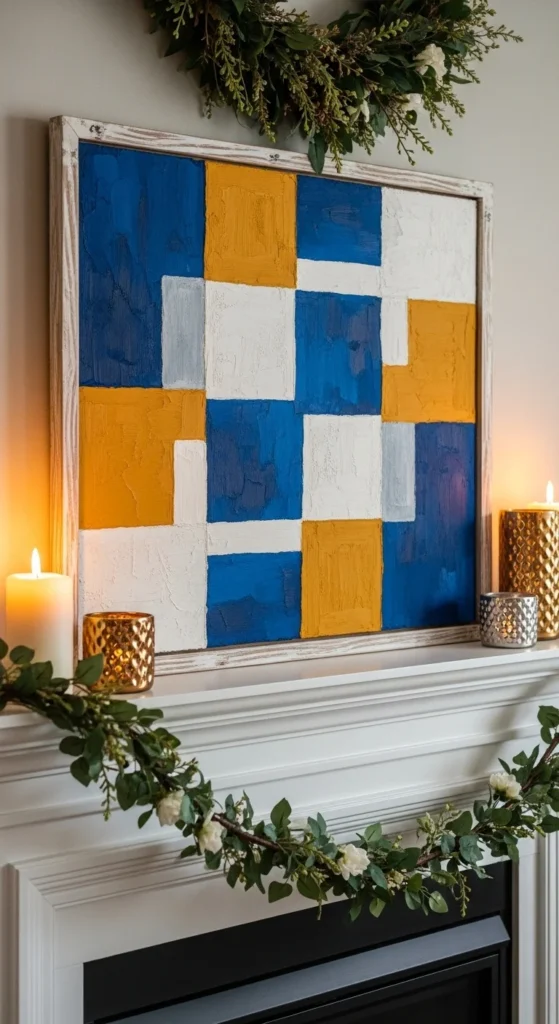
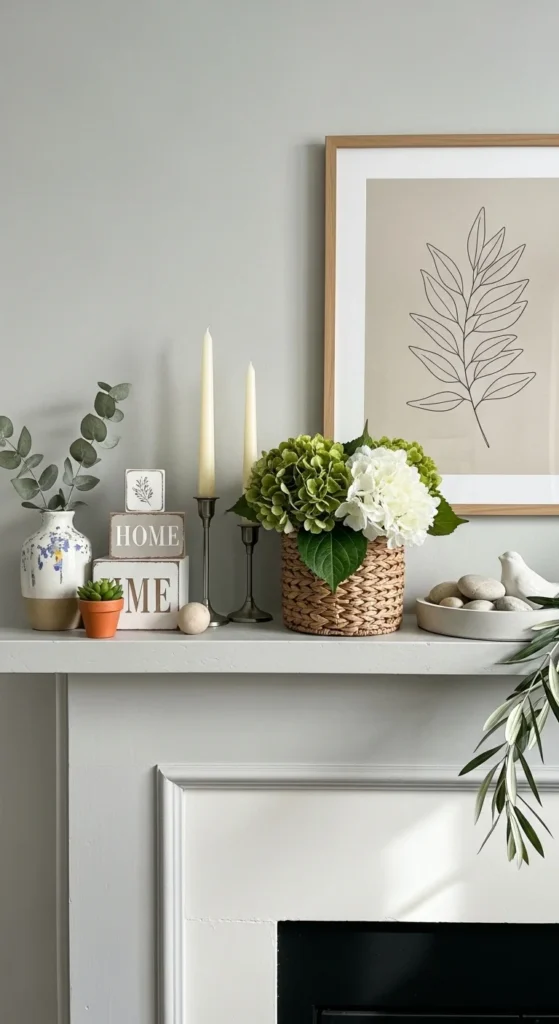
Create a Strong Focal Point
Every well-styled mantel needs one main anchor piece. This draws the eye and sets the tone for the rest of the decor.
Great DIY focal point ideas include:
- Framed printable art
- A simple abstract canvas
- A handmade mirror frame
- A large DIY sign or panel
Place the focal piece slightly above the mantel or lean it against the wall for a relaxed look.
Use Height Variation for Visual Interest
Flat lines make mantels look boring. Height variation adds movement and keeps the eye engaged.
Balance heights by:
- Pairing tall items with shorter ones
- Using stacked books to lift smaller decor
- Mixing vertical and horizontal shapes
Aim for a natural flow rather than perfect symmetry. This keeps the display feeling lived-in, not staged.
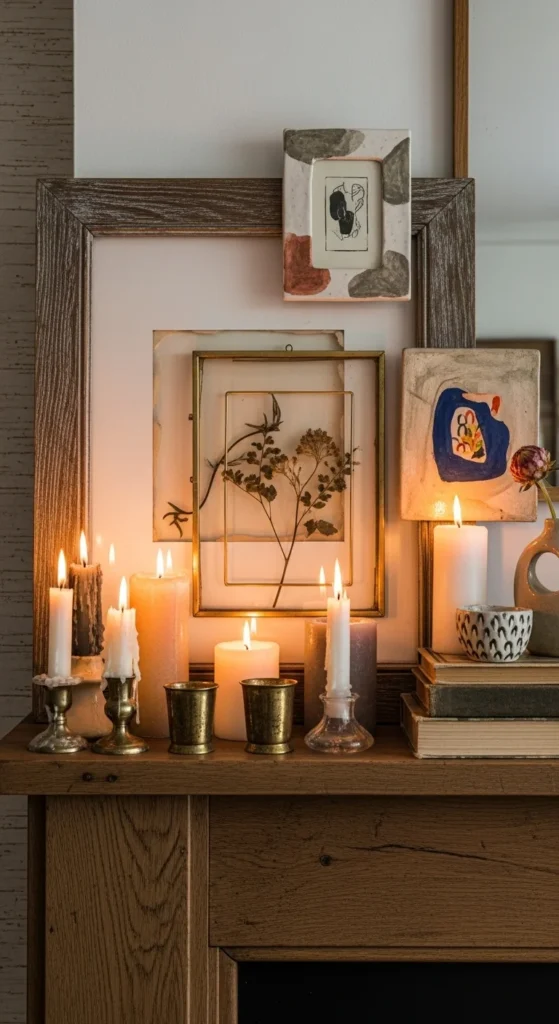
Layer DIY Decor Pieces Thoughtfully
Layering creates depth and helps smaller items feel intentional.
Simple layering techniques:
- Lean frames behind smaller objects
- Place decor in front of books or trays
- Overlap items slightly for a collected look
DIY pieces shine when layered because texture and imperfections become part of the charm.
Add Greenery for Softness
Greenery instantly brings life to a mantel and softens hard lines. Even one or two pieces can make a big difference.
Easy options include:
- Small potted plants
- Trailing greenery for gentle movement
- Dried stems in handmade vases
Greenery pairs beautifully with DIY decor and helps balance wood, ceramic, and metal textures.
Keep Decor in Small, Intentional Groups
Instead of spreading items evenly across the mantel, group them.
A simple rule to follow:
- Arrange items in groups of three or five
- Mix shapes and materials within each group
- Leave space between clusters
This makes the mantel feel styled instead of cluttered.
Step Back and Edit
Once everything is in place, step back and look at the mantel from across the room.
Ask yourself:
- Does it feel crowded?
- Is there a clear focal point?
- Do the colors work together?
Removing one item often improves the overall look. Editing is just as important as decorating.
Refresh the Mantel Over Time
One of the best things about DIY decor is flexibility. You can easily update your mantel without starting over.
Simple refresh ideas:
- Swap artwork seasonally
- Change greenery types
- Rotate handmade pieces
Small updates keep the mantel feeling fresh and relevant year-round.
Final Takeaway
Decorating a mantel using DIY decor is all about balance, layering, and intention. You don’t need expensive items or perfect symmetry—just thoughtful placement and a cohesive look.
Start with a focal point, mix heights and textures, and don’t be afraid to edit. Save this guide for later and come back whenever your mantel needs a refresh. Your space should feel creative, cozy, and uniquely yours ✨


